Quantcast
Channel: Infragistics Community
Viewing all 2372 articles
Browse latest View live

Developer News - What's IN with the Infragistics Community? (11/3-11/9)


Installing Visual Studio 2015 Preview

$
0
0

Unless you were living under a rock today, you have probably heard about the availability of the new Visual Studio 2015 Preview.  Now, your first question is can I install it side-by-side with Visual Studio 2013?  Well according to Scott Guthrie, yes you can.  So I did.  I figured I would walk you through the process that I went through.

The first thing you have to download the Visual Studio 2015 Preview.  Here are some of the highlights that ship with the Visual Studio 2015 Preview:

  • Visual C++ for Cross Platform Mobile Development
  • Visual Studio Emulator for Android
  • Visual Studio Tools for Apache Cordova
  • .NET 2015 Preview
  • Web platform and tools improvement
  • New IDE Features
  • Blend for Visual Studio 2015
  • Debugging Improvements
  • Memory Diagnostics
  • Application Insights

You should check out the release notes to get more details about what is included in Visual Studio 2015 Preview.  If you have been using any of the previous Visual Studio 2014 CTP bits, then you must uninstall it first.  Otherwise, you are asking for trouble.  So, just uninstall it, okay.

When you first run the installer you are presented with a number of options you can select to install.  Pick the ones you care about, and then go to the next step.

vs-step1

Now, you can sit back and watch progress bars, take a bathroom break, or go chase chickens in your back yard.  Anything you can do to kill a little time while the installer does its thing.

vs-step2

After this installation completes, you will have to reboot your computer.  Once your computer is done rebooting, you log back in and think you can get started with the Visual Studio 2015 Preview, right.  Well, not just yet.  You will be prompted with a secondary installer.  You only care about this if you want to do cross-platform development.  So, that basically means that you will be installing more stuff.

vs-step3

Hit the next button, and you will be presented with another list of more features you can install.  Including the new Android emulator, which is freaking cool.

vs-step4

Now, you might expect that when you click “Next”, things will start installing, right?  Well, that would just be too easy.  First you have a confirmation screen in which you must basically agree to all the licensing that no one actually reads.

vs-step5

Once you click install again, then the progress bars start ticking again.  Go chase some more chickens!

vs-step6

Finally!  We’re done!  Or are we?

vs-step7

Once you click on the “LAUNCH” button, we would now expect Visual Studio 2015 Preview to popup so we can start coding.  Right?  Well, not so fast there!  First you have to sign in.

vs-step8

Okay, so we enter our username and password, and now we can start using Visual Studio 2015 Preview.  Right?  Well, not yet, but almost.  Next, you have to choose your environment, our theme, and if you want to import your settings from a previous version of Visual Studio.

vs-step9

Now can we start using Visual Studio 2015 Preview?  Yes you can!

vs-step10

As you can see, on the surface not much has changed.  It looks just like Visual Studio 2013.  The install process it a little longer than I would hope it would be.  Maybe Microsoft will fix that by the time it actually ships.  At least, I sure hope they do.  I also discovered a small issue with the new Xamarin integration.  During the keynote at todays Visual Studio Connect event, Xamarin announced that they support Visual Studio 2015 Preview out of the box.  Well, that’s not true at the time I tried it.  I previously had Xamarin installed for Visual Studio 2013.  I created a new Android application in Visual Studio 2015 Preview, and got the following message:

vs-step11

Please install Xamarin.  Okay no problem.  I just need to install the latest version of Xamarin that is available on the website.  Got it.  Well, I go grab the latest version of 5.5.3, and try again.  Upgraded my Xamarin version, and it still didn’t work,  So, not sure what’s going on here.  Maybe I am just being impatient and Xamarin hasn’t released the supporting version of their tools yet.  I guess I’ll just have to wait for them a little longer.  Until then, I am going to play with the new tooling around WPF.

Hopefully this gives you an idea of what to expect when installing Visual Studio 2015 Preview.  As always, feel free contact me on my blog, connect with me on Twitter (@brianlagunas), or leave a comment below for any questions or comments you may have.

Feature Spotlight: Visual Studio 2015 Preview XAML Peek and Edit

$
0
0

So, I just found a feature in the Visual Studio 2015 Preview that will probably be one of my most favorite and most used.  This feature is plain out AMAZBALLS!  Yeah, that’s right… I said it… AMAZBALLS!  What is the magical feature?  It’s the XAML Peek and Edit feature.  Wait.. what?  Let me explain.

Let’s say you have a massive XAML application, in my case it would be a WPF application, and you have tons of templates, styles, and other resources kept nicely organized in resources dictionaries that may span multiple assemblies.  Obviously these resources are used all over the place.  We all know how complicated some solution folder structures can be, and finding these resources can just be a major pain in your ass.  We have all been there.  Well good news, your ass will never hurt again.  Well, not because of this issue anyways.

Let me demonstrate.  Lets start with a simple scenario so we can just get the point across.  I have a simple Window with a single Button defined like this:

<Window x:Class="WpfApplication2.MainWindow"
        xmlns="http://schemas.microsoft.com/winfx/2006/xaml/presentation"
        xmlns:x="http://schemas.microsoft.com/winfx/2006/xaml"
        xmlns:d="http://schemas.microsoft.com/expression/blend/2008"
        xmlns:mc="http://schemas.openxmlformats.org/markup-compatibility/2006"
        xmlns:local="clr-namespace:WpfApplication2"
        mc:Ignorable="d"
        Title="MainWindow" Height="350" Width="525">
    <Grid>
        <Button Style="{StaticResource ButtonStyle}">Content</Button>
    </Grid>
</Window>

As you can see this Button has a style assigned to it called ButtonStyle.  Let’s take a look at this style that is defined in our App.xaml.

<Application x:Class="WpfApplication2.App"
             xmlns="http://schemas.microsoft.com/winfx/2006/xaml/presentation"
             xmlns:x="http://schemas.microsoft.com/winfx/2006/xaml"
             xmlns:local="clr-namespace:WpfApplication2"
             StartupUri="MainWindow.xaml">
    <Application.Resources>
        <Style x:Key="ButtonStyle" TargetType="Button">
            <Setter Property="Background" Value="Green" />
        </Style>
    </Application.Resources>
</Application>

Nothing fancy.  Now, let’s say that we are doing some cool programming stuff in our Window where the button is defined, and we want to change it’s style.  Well, you can go navigate the solution explorer to find the style, if you happen to know where it is.  Or, you can use the VS2013 feature of “Go to Definition”, but how about we do something even better.  First lets “Peek” at the definition of the resource.  We can do this by right-clicking the StaticResource and selecting “Peek Definition”, or simply press ALT+F12.  Now watch the magic happen:

image

Do you see it?  No, well let’s zoom in a little.

Peek

Now you should see it.  We have peeked into the definition of the ButtonStyle, and we can see it in it’s entirety within the same editor window.  But, wait… it gets better.  Let’s say we want to change the style so that our button’s background is red instead?  Well, no problem.  Let’s just edit it right there in the peek window.

Peek and Edit

Accept the change and watch what happens to the button in the designer.

image

BOOM!  Mind blown!  You can even open the peeked code snippet into its own document window in the editor by clicking on the “Promote to Document” option.

Print to Document

As you can see, this will be an extremely helpful feature when dealing with XAML resources.  I have been waiting a long time for this feature and now it is here.  I hope you are as excited about this feature as I am.  Which, I am positive you are.

As always, feel free contact me on my blog, connect with me on Twitter (@brianlagunas), or leave a comment below for any questions or comments you may have.

What's New in IG Test Automation 2014.2

$
0
0

The primary focus for Infragistics Test Automation is to offer you peace of mind. Such that when you develop with our controls, your teams can seamlessly implement automated testing of the user interface (UI) to confidently produce higher-quality releases. IG Test Automation, currently supports our Windows Forms controls via HP’s Unified Functional Testing (UFT) and IBM’s Rational Functional Tester (RFT).

As IG Test Automation’s purpose is to automate tests of the UI of applications using IG controls, this what’s new will start off with the new controls, it should be noted that CTP controls are typically not supported until full release. I will follow with changes in existing controls that had changes that would affect how the UI behaved, lastly I will list any improvements to IG Test Automation that is not dependant upon the controls.

New Infragistics Controls

IG Windows Form’s UltraWinCarousel

The UltraCarousel is similar to our XamlCarousel. A list of items are displayed for the user in a tile-like fashion along a predefined path. The control will allow the user to activate an item and navigate from one active item to another with animation. In addition it will allow the developer to provide a custom path for the items to be rendered on.


IG Control’s with UI altering Improvements

More Right to Left support

We started in 14.1 introducing Right to Left support in our of our editor controls. In 14.2 we expanded our right to left support to include the following controls.

  • UltraWinTree
  • UltraWinGrid

IG Windows Form’s UltraPivotGrid

New to the UltraPivotgrid UI functionality was the ability to resize the row headers, and a sleek Resizable row headers, and as the sleek new CompactView.

  UltraToolbars Manager, Tab Item Visibility

Improved Touch Support

We have been adding touch support to our WindowsForms UI controls for several releases now, and while neither HP or RFT directly support them. We do record and replay the basic touch interactions as those interactions also trigger our non-touch based events. Such that if you touch a cell in a WinGrid to activate it, it records ActivateCell, touch a button, the Click event fires, etc. We record those interactions and can replay them.

IG Test Automation improvements

For those familiar with IG TestAutomation, you have likely used our property access methods. GetNAProperty, SetNAProperty, and GetNAProperties. if not essentially what they allow you to do is to dig into the public property structure of the control you are interacting with. We created it for HP Window's Forms support and expanded it in the WPF support to include custom properties, which essentially are properties that don't exist on the object, but we created to help expose commonly requested data. We merged that capability back to the WindowsForms so that we might be able to create custom properties for those controls as well. To start we added a few available on every object type, ToString which essentially calls the ToString method on the object so that you may better interrogate it, and Type which returns the System.Type on the object type.

Download the free trial of IG TestAutomation for HP 14.2
http://www.infragistics.com/products/windows-forms-test-automation-for-hp/download

Download the free trial of IG TestAutomation for IBM RFT 14.2 
http://www.infragistics.com/products/windows-forms-test-automation-for-ibm/download


Microsoft .NET is Open for Every Developer

$
0
0

Microsoft delivered on their commitment to supporting cross-platform developer experiences and have begun open sourcing the full server-side .NET core stack. The multi-billion dollar company is hardly known for open sourcing any of their products, so the news may be a shock to some. However, ASP.NET and the C# compiler have already been open sourced so the announcement isn’t all that surprising. This release is mostly about open sourcing the remaining Core .NET framework. During the next few months, the open source .NET will be expanding in order to support cross-platform integration with Linux and Mac OS X in addition to Windows.

Developers generally seemed to appreciate what .NET offers but some may have shied away from the fact it was closed-source and only supported on Windows. Now that Microsoft is addressing these concerns, they believe developers won’t have any reasons not to use their .NET framework. This should be true since people enjoy being able to work freely and without any restrictions. Removing these limitations seems to be a good decision by Microsoft since it will open up possibilities that weren’t always available before.

Visual Studio Community 2013, also released along with the announcement, which is a new free edition of Visual Studio which will include access to the Visual Studio core toolset and supports full Visual Studio extensibility. This edition of Visual Studio will let developers target any platform from desktop and mobile to web and cloud. The support for Visual Studio extensibility also offers access to an ecosystem of over 5000 extensions. Along with access to Visual Studio extensibility, extension authors will have some more opportunities to create new tools and experiences on top of the Visual Studio platform.

Open sourcing a project often carries the perception of a company giving up and throwing it away. On the contrary, Microsoft believes that this will be the path toward giving .NET a broader platform to work with. For more information about this announcement and a Q&A by Somasegar, check it out here

Source: Microsoft takes .NET open source and cross-platform

Installing Xamarin for Visual Studio 2015 Preview Side by Side with Visual Studio 2013

$
0
0

If you are a current user of Visual Studio 2013 and Xamarin, and you are wanting to start playing around with the new features in Visual Studio 2015 Preview, including the new Android emulator, then this post is for you.  I spent most of my morning trying to get this to work, so I will save you the troubles that I went through and just tell you what you need to do.  This should make your life so much easier.

First, you need to install Visual Studio 2015 Preview.  Well, that was easy.

Next you need to uninstall everything Xamarin that you have.  I know it’s a pain, but trust me, this will save you time and frustration going forward.

Now, open up Visual Studio 2015 Preview, and create a new Android project.

Visual Studio 2015 Project Templates

When the project is created, you will see a document with instructions on how to download Xamarin.

Install Xamarin

Do what the form says and click the “Download Xamarin” button.  When you click on that link it will take you to a page to download the actual Xamarin installer for Visual Studio 2015.

Download Xamarin

Once you fill out the form, click the download button of your choice and save or run the “XamarinInstaller-VS2015.exe” file.  I personally like to save them before I run them, but that’s just me.

Once you have completed the Xamarin install, launch Visual Studio 2015 again, and you will notice you have some new Project Templates.

Xamarin Project Templates for Visual Studio 2015

As you can see, I am running the Business edition of Xamarin, since I have Xamarin Forms available to me.  Hit okay, and let the magic begin.  Within a few seconds you will have a number of projects in your solution explorer that you can use to start writing cross-platform apps.

Xamarin Forms project

Let’s get that Android Emulator Working

The next thing we want to do is get that cool new Android emulator working that ships with Visual Studio 2015 Preview.  Start by making the Android project your start up project.  This will give you some new options in your Debug toolbar.  The main one being the new Android Phone emulator.

Visual Studio 2015 Preview Android Emulator debug options

Let’s go ahead and hit F5 to start debugging out Android app, and see what happens.

Visual Studio 2015 Preview Android emulator error

Well, crap!  That sucks.  Looks like Xamarin didn’t want to shake hands with Visual Studio 2015.  Or is that the other way around?  Anyways, not a big deal.  This is a known issue and has an easy fix.  Simply right-click on the Android project and click Project -> Properties -> Android Options –> and uncheck"Use Fast Deployment (debug mode only)".

Visual Studio 2015 Preview Android emulator error bug fix

Now, hit F5 one more time and let’s see what happens.

Visual Studio 2015 Preview Android emulator

SUCCESS!  We are now up and running with Visual Studio 2015 Preview and Xamarin.

I hope you find this post helpful, and maybe it even saved you some time and a little pain relief.  As always, feel free contact me on my blog, connect with me on Twitter (@brianlagunas), or leave a comment below for any questions or comments you may have.

NUCLiOS IGGridView QuickTip: Register a Cell

$
0
0
So the IGGridView is all about creating custom cells to display whatever you'd like. But did you know that you don't have to constantly check to see if a cell is available to be dequeued or then create. Instead you can always expect your cell to exist when you dequeue. First lets look at the original way to create a cell: IGGridViewImageCell * cell = [gridView dequeueReusableCellWithIdentifier : @"MyImageCell" ]; if (!cell) cell = [[ IGGridViewImageCell alloc ] initWithReuseIdentifier...(read more)

Why Kids Should Learn to Code

$
0
0

Learning code can be similar to anything else we want to enlighten our children with. The same way we teach our kids to read sheet music and play an instrument, they can also be taught how to code and program a computer. In schools or in an after-school program, we can provide children with some great opportunities and exposure to at least some of the basic concepts of programming.

Some of us were very lucky growing up and our parents provided us with all of the latest technology, which at that time, was pretty limited. Back then, how many kids were saying they wanted to grow up and become computer programmers? Probably, not too many… The few that did, were going on to create things like Microsoft, Google, Apple, and Facebook. Nowadays, almost all of us have access to a decently powerful computer and a connection to the Internet. The opportunities are all out there for the next few generations, it’s all just a matter of who will take advantage of them.

Code.org is a great online environment that is free to use and has tons of resources available for people interested in learning how to code and program in a new language. Their goal is to promote participation in computer science by making it available for everybody and especially in more schools. They released a promotional video about a year ago with some of the greatest entrepreneurs of our time including Bill Gates, Mark Zuckerberg, and Jack Dorsey. Check it out below.

[youtube] width="560" height="315" src="http://www.youtube.com/embed/nKIu9yen5nc" [/youtube]

Being able to code may even be more advantageous than learning a second, third, or even fourth language. It doesn’t really matter which career path they eventually decides to take, the skills learned from programming are universally applicable. Designing and learning how to create basic programs can be fun and exciting for kids when they can see what they were able to produce on their computers. MIT has a program called Scratch, which is also available online for free that kids can try and create their own programs with. It’s a very simple tool that can give children a fun and introductory environment for them to learn and play with. If you see your kids excited and enthusiastic about learning more about what they can do with computers, then you can help them develop those interests more later on.

There are several classes, programs, and camps for kids to attend to learn some coding. All of which can be found online by searching for local coding and programming courses or camps. Here are some of a few that I was able to find, including one hosted by Microsoft.

Microsoft– Summer Camps, for Game Coding, Designing, YouthSpark, and CodeIT

iD Tech– New Jersey Summer Camps for courses in Game Design, Web Design, and Coding

International Ivy– New Jersey Summer Enrichment Programs for Computer Programming in Scratch and C++


NUCLiOS IGGridView: Stretch Rows

$
0
0
Even if you're an IGGridView pro, you might not have known about the Stretch Row feature, although if you've used our Samples Browser, you've seen it and used it plenty of times. Stretch Rows are basically exactly what they sounds like. Essentially, they're rows that have only one column, even if DataSourceHelper has Multiple columns being displayed. Believe it or not, the area above the Layout Section Header, where the Images are, is another Row in the same IGGridView. We're...(read more)

What's New in IG Test Automation 2014.2 for WPF

$
0
0

The primary focus for Infragistics Test Automation is to offer you peace of mind. Such that when you develop with our controls, your teams can seamlessly implement automated testing of the user interface (UI) to confidently produce higher-quality releases. IG Test Automation, currently supports our WPF controls via HP’s Unified Functional Testing (UFT).

With the release of our 2014 volume 2 WPF Control suite we added three amazing new controls. To complement those controls we have implemented comprehensive support via our IG Test Automation for WPF.

New Infragistics Controls

xamSpreadsheet

This new Microsoft Excel-inspired control allows you to embed Excel document creation and editing experiences right into your WPF applications. Built on top of our existing Excel Framework, the xamSpreadsheet provides an interactive control to our powerful Excel document capabilities and includes powerful editing and cell formatting features, without needing the program installed on their machine.


xamPropertyGrid

Harness the power of Visual Studio’s property grid control and bring it to your WPF applications with this new control, which allows you to browse, view, and edit the properties of one or more objects with its built-in collection of standard property editors. 


xamDiagram

The new xamDiagram control allows you to create your very own Visio-inspired diagramming solution within your WPF applications. Now you can easily build flow charts, process diagrams, and other advanced layouts that mimic the familiar Visio interface. You’ll also be able to manually create shapes and connections in code and XAML, or use your toolbox to drag our predefined or custom shapes onto your design surface.


Download the free trial of IG TestAutomation WPF for HP 14.2

http://www.infragistics.com/products/wpf-test-automation-for-hp/download

Why “Ultra”?

$
0
0

Have you ever wondered why we have some controls (like those for Windows Forms or ASP.NET) that are named UltraGrid, UltraChart, or UltraWhatever, but in the Documentation, Web Content, and Samples, the same controls are named WinGrid, WinChart, and WinWhatever? Here’s your answer!

Ready for a bombshell? We really just used the word “Ultra” as a prefix for all of our controls because it sounded cool! Hey, the early 2000’s were simpler times.

For many years, our documentation, web content, and conversations referred to the controls as “The Ultra[whatever] Control”, but as Infragistics grew and developed a Marketing department, it was decided that “Ultra” sounded kind of silly and the controls needed to be marketed differently. So began the online marketing and documentation naming of WinGrid, WinChart, WinSchedule versus UltraGrid, UltraChart, and others.

So, for example, WinSchedule is a marketing name that represents a batch of individual controls such as UltraCalendarView (WinCalendarView), UltraCalendarInfo (WinCalendarInfo) and so forth. WinEditors (there is no “UltraEditors) that represent a batch of individual controls such as UltraMaskedEditor (WinMaskedEditor), etc. Now you can start to see the pattern, right?

So, whenever you see Ultra or Win, remember: the “Ultra” naming always refers to the controls and components that you will find in your Microsoft™ Visual Studio™ toolbox. Those are the names you look for when you want to drag and drop controls onto your form design surface. In marketing, documentation, and samples, you will see the same controls named with the prefix “Win”.

Some of you may be thinking, “Well, if they decided to not use “Ultra” and they changed the online materials to “Win”, then why are there controls and components still named “Ultra”? It’d be so simple to just change their names!”

To be honest, we could make such a change; however, that simple change would cause a devastating breaking change catastrophe to more than 90% of our customer base! All of the apps our customers have created would completely break, and every line of code that refers to any of those controls would be broken! So it’s not so simple.

And there you have it – now when you’re playing Infragistics Trivial Pursuit with your friends, you can proudly be the one with the correct answer to “Why does Infragistics use Ultra?”

NUCLiOS IGCalendarView: Customer Requested Features

$
0
0
The response to the IGCalendarView has pretty awesome. And we've gotten a lot of feedback. While we weren't able to get to all of the feature requests yet, we didn't want to leave you hanging. Along with some work on performance improvement, we've added some features from the community. Its worth noting, that these features are available in the upcoming 14.2 release, along with every version going back to the original in 13.2. Appointments can be Individually Colored Previously, appointment...(read more)

App Development Made Easy

$
0
0

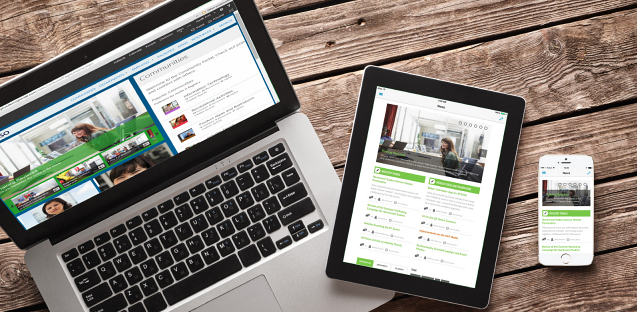
With Indigo Studio, you get rapid prototyping to experience your app before you code it. And our HTML5 Page Designer is an intuitive tool that will have you dragging-and-dropping your way to app success in no time. We sat down with our Product Team to discuss what each of these tools brings to the table – and how they can be used together to simplify your development process even more!

Indigo Studio is a rapid prototyping tool that helps developers envision their apps before they code them. Why is that important?

George Abraham, Interaction Design Manager: Here at Infragistics, we say that “Great apps happen by design”. To deliver applications that your users will love, we believe the design process needs to be inclusive and customer-centric. This doesn’t just mean keeping the customers' interests in mind while designing. It’s really about bringing the customer into the design process by letting them inform decisions throughout the lifecycle with design iteration.

Most of us understand that design iterations are key to a good design practice. However, while cost of iteration is difficult to measure, one thing is certain: iteration in code is muchmore expensive than iteration using a code-free solution, in terms of effort and monetary costs. If customers and stakeholders don’t experience the application until the very end of the development process, we have concentrated all that risk at the very end. Even with the best intentions and experienced practitioners, waiting until deployment to get customer feedback is a bad idea.

So that’s why Indigo Studio exists: to allow you to create interactive app experiences that can be evaluated by users even before you write a single line of code. 

And the HTML5 Designer simplifies the development process too?

Ambrose Little, Director of Product Management: Definitely. The Page Designer is all about making Modern Web line-of-business app development easier to grapple with. It’s really great for getting started quickly with advanced components like our data grid and data chart in Ignite UI. Using the designer, you can drag and drop your components on a WYSIWYG design surface and configure them faster with our easy-to-use component editor.

These sound like two great tools on their own – but how do they work together?

Ambrose: Well basically, Indigo Studio prototypes can give you Web code to get you started, and you can copy and paste that into the Page Designer to take that prototype to the next level without having to recreate everything manually.

George: Exactly. With the latest version of Indigo Studio, we included support for responsive web-page layout using Bootstrap, a popular responsive framework. However, instead of using obscure column span definitions, Indigo Studio allows you to configure the layout visually. You can easily extract the HTML mark-up - complete with bootstrap layout grid - from a running prototype and use it to jump start your app development inside the Page Designer.

And since you already completed design iterations using the code-free prototype, you can now focus on building-it-right by leveraging the enterprise-grade UI controls (e.g., Charts, Grids) provided in Ignite UI. So think of Indigo Studio prototypes as a means to validate ideas with users as cheaply as possible, and the IgniteUI Page Designer as the place where UI components are further refined and configured (events and data-binding) to live inside a real line-of-business application.

What inspired the creation of these tools? They work so well together, was it a “chicken or the egg” type thing?

Ambrose: They really solve two different problems. Indigo is all about helping you discover the best designs through prototyping, by staying focused on your users and their stories. But of course, even though Indigo is super-fast, that doesn’t mean you want to manually recreate everything when you actually start coding your app. That’s why we developed the code exporting feature of Indigo—to jump start your development.

That aspect—jumpstarting your development—is also what the Page Designer is all about, so there’s a natural intersection between the two: you don’t have to restart from scratch. Build out your idea, grab that code, and start enhancing it with real data and advanced Web controls without having to manually hand code it all.

What kind of experience will someone need to work with these tools?

George: To use Indigo Studio’s prototyping capabilities effectively, all you need is a narrative about what and why the user would do something in the application. With that in hand, Indigo Studio can help you prototype this user flow, complete with UI, interactions, and animated transitions. We have designed the application such that you don’t need to have any knowledge of code to design an experience for the story-of-use. Everything in Indigo Studio is WYSIWG. And it’s just as easy to “share” the prototype to review it on devices using the web browser. 

Ambrose: That’s right - anyone who works with software regularly can more or less figure it [Indigo Studio] out. It was designed specifically with UX folks and business analysts in mind, so you certainly don’t need to be a developer.

The Page Designer assumes that you have some development experience and a basic familiarity with HTML, CSS, and JavaScript—the core technologies for the modern Web. Of course, you can drag and drop and configure things to an extent without that knowledge, but at some point you’re gonna need to grab the code and integrate it into a real development project. That’s the focus there.

And no matter who you are, you can save a ton of time and quickly try ideas out and get everyone on the same page before you start writing your production code, which saves a ton of time later in the development process with fewer surprises and changes.

It’s really amazing how quickly you can try different interactive ideas, even with complex animations, and build them out into apps using these tools.

To experience Indigo Studio and the Page Designer for yourself, get them both free for 30 days when you try Infragistics Ultimate!

How to Develop a Progressive Mobile SharePoint Solution

$
0
0

As a developer, you may have heard of Infragistics’ mobile SharePoint solutions: SharePlus, which brings all of the data and functionality of SharePoint to your mobile device, and ReportPlus, a self-service dashboarding tool that allows you to bring that mobile SharePoint data to life by creating amazing visualizations with charts, maps, and other interactive features. But did you know that it’s possible to create your own highly personalized mobile SharePoint solutions with these tools?


Built with the Developer in Mind

Thanks to a variety of extensibility options, you’ve got endless possibilities when it comes to accessing, exploring, and gaining insights from your information. Using your existing HTML skills (and Infragistics’ own HTML5 and jQuery tools!), you are empowered to create not just apps, but comprehensive solutions for your Enterprise or customers.

A Personalized Experience

You can use SharePlus’ exclusive JavaScript API to customize your app’s start screens with brand-specific views – or “launchpads” – that adapt to your users and their needs for an experience that isn’t just aesthetically pleasing, but functional too. When you integrate web technologies like HTML, CSS, and JavaScript into your launchpads, you can achieve high quality interactions that take your user experience to the next level.

You could potentially use launchpads to personalize the gateway to every site, and even change the behavior of that site for different users. For example, someone in sales may need one-tap access to the prospects in their region, while delivery drivers require real-time inventory data. With launchpads, it’s all possible.

Create Your Own Data Visualizations, Too

Once you’ve accessed that data in SharePlus, you can then use ReportPlus to create insightful dashboards with more than 20 different data visualization options – and just like SharePlus, you can create your own custom visualizations as well, with high quality interactions like actionable buttons. You can even integrate Infragistics’ own HTML5/jQuery toolsets for responsive web development.

In short, SharePlus and ReportPlus are not just applications, but platforms to build your own mobile SharePoint solutions.

Develop with our Launchpads SDK

Thanks to the JavaScript API, you can access all of your SharePoint content, including information from the user profile, search results, document libraries, lists, taxonomies, and much more. Working with the API will help you develop meaningful behavior with your implementation, allowing you to manage the app settings, check the connection status, or even change your launchpad at run-time.

By leveraging offline support and synchronization, you can also present SharePoint content even without connectivity.

Want to Learn More?

Check out our whitepaper, which has a lot of great details about how to mobilize your SharePoint customization and also how to optimize the access to your SharePoint information.

And if you'd like to learn how to incorporate SharePlus or ReportPlus into your applications under your brand, click here to schedule a meeting with one of our product specialists to see the enterprise versions of these apps for yourself.

JSNext Bulgaria 2014–Event Recap

$
0
0

On November 23 was held the first event focused on the cutting edge JavaScript technologies – JSNext Bulgaria 2014. JSnext  is the largest conference in Bulgaria for JavaScript technologies.

What is JSNext Bulgaria

  • The very first conference in Bulgaria dedicated to the cutting edge JavaScript and related JS frameworks
  • An event organized with the support of Infragistics, jQuery Sofia UG, Infragistics Friends ( BI & .Net) UG and many volunteers
  • Thanks to the sponsors who helped cover the expenses!
  • An one day event with sessions dedicated to all that is JavaScript.
  • It is a chance for the local community to immerse in their favorite web technologies
  • The largest event for WEB developers in Bulgaria for 2014
  • JSNext Bulgaria inherits jQuery Bulgaria event


Why  JSNext Bulgaria

  • JavaScript is not jQuery any more
  • JSNext (aka JS version next ) Bulgaria is an event about cutting edge JS-related technologies


Event history:

After the few successful “Saturday” format events across different platforms and jQuery Bulgaria conference, the JavaScript event received major interest.

JSNext inherits jQuery Bulgaria conference, but JSNext Bulgaira is a new kind of event :
mainly targeting the latest and the future JavaScript technologies

Infragistics confirmed its support for the event: Thanks to Jason Beres: VP of Development Tools,  Product Management, Community and Evangelism @ Infragistics
Thanks to all community leaders who also confirmed their support!

We chose Sofia Event Center as the best location for this event.

All our speakers are also volunteers – they decided to cover their own expenses to be possible to avoid charging community members


Infragistics participation in the event:

Infragistics was the main sponsor and organizer of the event.

There was one keynote session and one technical presentation from Infragistics Inc.:


Some statistic

  • Nearly 750 registrations
  • More than 600 attendees on site
  • First event in Bulgaria, dedicated to the cutting edge JavaScript related technologies. 
  • The biggest event for WEB developers in Bulgaria this year
  • A Free event for student, academics and community leads
  • 22 sessions in 4 tracks
  • Attendees from 6 countries (Ukraine, Poland, Macedonia, Serbia , Romania and Bulgaria)
  • 25 Speakers from 4 countries (Ukraine, Poland, Macedonia and Bulgaria )

Pictures from the event:

Some photos are availablehere .

Follow @jsnextconf event on Twitter with hash tag   and get news on all our events with #jsnext and #jsnextconf.  Additional information can be found at the conference website - www.jsnext.net

As always, you can follow us on Twitter @mihailmateev and @Infragistics and stay in touch onFacebook,Google+andLinkedIn!


Warm Regards,
Team JSNext Bulgaria


Developer News - What's IN with the Infragistics Community? (11/10-11/23)

$
0
0

For those of you keeping up with this series, it has in fact been two weeks since the last update! So now you're in for a treat -- two weeks in one post! Here we go....

November 10-16

5. Why Women Stopped Coding in the 1980s (readwrite)

4. Congrats, HTML5 - You're All Grown Up Now! (readwrite)

3. A Guide to Conducting a Mobile UX Diagnostic (Smashing Magazine)

2. 10 Insane Ancient Achievements that Science Can't Explain (RiseEarth)

1. 9 Cutting-Edge Programming Languages Worth Learning Now (InfoWorld)

November 17-23

5. How to Learn Programming (Levi Notik)

4. 10 Things You Didn't Know About Java (Java)

3. Twitter Unveils its New Developer Toolkit (Fabric)

2. Mobile is Eating the World (Andreessen Horowitz)

1. 15 Stunning Mobile Interface Designs (Daily Designer)

Infragistics Windows Forms SR Notes – November 2014: 13.2, 14.1, 14.2

$
0
0

With every release comes a set of release notes that reflects the state of resolved bugs and new additions from the previous release. You’ll find these notes useful to help determine the resolution of existing issues from a past release and as a means of determining where to test your applications when upgrading from one version to the next.

Release notes are available in both PDF and Excel formats. The PDF summarizes the changes to this release along with a listing of each item. The Excel sheet includes each change item and makes it easy for you to sort, filter and otherwise manipulate the data to your liking.

In order to download release notes, use the following links:

WinForms 2014 Volume 2 Service Release (Build 14.2.20142.2034)

PDF - Infragistics WinForms 2014 Volume 2
Excel - Infragistics WinForms 2014 Volume 2

WinForms 2014 Volume 1 Service Release (Build 14.1.20141.2097)

PDF - Infragistics WinForms 2014 Volume 1
Excel - Infragistics WinForms 2014 Volume 1

WinForms 2013 Volume 2 Service Release (Build 13.2.20132.2098)

PDF - Infragistics WinForms 2013 Volume 2
Excel - Infragistics WinForms 2013 Volume 2

Developer News - What's IN with the Infragistics Community? (11/24-11/30)

Video: How to Hide Cells in Your Application Prototypes

$
0
0

In our most recent how-to video, we show you how to hide cells when you're building an application prototype in Indigo Studio, by creating a navigation element which looks different on the phone than it does on the desktop. 

[youtube] width="560" height="315" src="http://www.youtube.com/embed/qTSmNSjlEK0" [/youtube]

On the phone, we would really like to see a menu icon which shows up on the right side, but on the desktop you would like them to be separated out like a regular navigation. 

For that we would use this visibility property which by default the elements are visible but you could choose to hide it in a particular form factor and then show it in a different form  factor. 

Let's create a menu button first.  In the first row, there is actually just one cell in here.  I'm just going to make some room here so this title is inside a column span of 6, then I add a new item here.  As you can see the new item has a default height, but we won't worry about it right now.  I'll just double click and in here I'm just going to look for an icon, right here.  As you can see the menu icon is right now centered so I can just ask it to float to the right and then just give it a margin on the top of 15 pixels so it just aligns nicely. 

Before we can hide or collapse a certain column or cell I'm going to create it first.  Let's insert a new cell and give it the full width.  Inside this cell, let's just add some text and say, getting started.  I'm going to central line this text.  I'm just going to quickly name them so they look different and set the visibility of this cell to hidden.  The moment you do that, the cell takes on this blue highlight and you also see these indicators here which says XS, SM, MD, and LG which kind of implies that they'll be automatically hidden in all these form factors. 

To see exactly what the user would see, you can actually go up to the row.  We have this option to highlight hidden cells. If you turn that off, we will no longer highlight these cells.  Let's just do that.  This is exactly what the user would see. 

In order to trigger this particular menu, we will add an interaction on the menu button.  I'm just space selecting to select the menu button directly.  I say add an interaction when the user taps or clicks menu, change screen to new state.  In this new state, I'm going to select the row in which this menu is under.  I'm going to say, highlight hidden cells, and I'm going to select that cell and say, visibility is visible.  What we have done is from the starting state, you've added an interaction where we are setting that particular cell to be visible.

Now, let's just go back to our starting state.  Look at the tablet form factor.  Again, it's up to you whether you want to show the same kind of navigation for the tablet or not.  In this case, I do.  I would like to show a slightly different navigation for desktop.  For that I would go to desktop and in the desktop mode I would select this row right here and I'm going to say highlight the hidden cells.  I'm going to select the cell in which we had the menu icon and set the visibility to hidden.  The moment you hide it, you see these new indicators here which basically says that the menu cell is going to be hidden on the medium form factor, the large, (likely desktop) and very large desktop.

Instead, I would like to say this cell is always visible so I'm just going to come here and you can see that it says from XS hidden.  It then shows that where it inherited it from.  I'm going to set it to visible.  Same thing for this row, I'm going to now say that don't highlight it any more. 

Now this second cell actually has a span of 12, but the bootstrap is just occupying 2 column spans. Then I'm going to select this particular cell and reduce it's column spans and make it such that it occupies the remaining amount of space.  Then I'm going to edit this cell.  Right now each of these navigation items are full width and I don't want that.  I'm just going to select all of them to give them a column span of say 2.  That's about it. 

If you want to take a look at what actually has happened, if you select that particular row and say, highlight hidden cells, you'd see that the menu item is hidden on medium and large.  When you run the prototype you'd see that if I'm in the stretch mode then I re-size it and it comes to tablet form factor, it hides that particular cell which had the individual menu items and shows the cell which had the menu icon.  If I reduce it further, no change. 

Now, since we already have an interaction on it and that's what's showing on this highlight on here, when I click on this interaction, you're actually be able to see the menu items which are stacked automatically. 

But as you would have noticed that we don't have a toggle interaction specified in the menu button so let's just do that so that we can click on it and click on it again to basically collapse this menu.  I go back to my small form factor which was the phone.  Then select the menu icon directly using space select.  In here I'll edit the interaction under options.  I'll say when the user does this again, reverse the changes and that should do it.  When I run the screen, menu's shown, hide the menu.  If I re-size it, I get the full navigation available. 

As you can see, it's easy to create a navigation element that will look different in a phone versus the desktop, in Infragistics’ UX prototyping tool, Indigo Studio. For more videos and tutorials like this one, be sure to subscribe to our YouTube channel– and thanks for watching!

Why Did Women Stop Coding?

$
0
0

Nowadays, it’s well known that most of the more accomplished entrepreneurs in technology are men. Bill Gates, Steve Jobs, and Mark Zuckerberg are just a few obvious candidates of our generation that have reaped the greatest success. How come we rarely hear about women programmers achieving similar feats? Apparently, around 1984, the amount of women pursuing degrees in computer science plateaued and has been continually trending downward.

Around the time of WWII, after the bombing of Pearl Harbor, most of the men were being enlisted to join the military. A few of the women that were also enlisting, obviously not for combat roles, had chosen to become what would later be known as, computer programmers. These women were the first to be using top secret experimental computing machines with the purpose of determining ballistics calculations, crack encrypted messages, and run complicated mathematical equations that would eventually lead to development of the nuclear bomb.  They were also the firsts to design, improvise, and debug the world’s first computer programs. Essentially, women were crucial in order to end the war and initializing the computing industry as we know it.

What happened in 1984 that caused women to shy away from pursuing careers in computer science? For decades, the amount of women studying computer science had been growing faster than the number of men. In 1984, the percentage of women in the computer science field had peaked, and has since fallen a significant amount. One of the possibilities could have started when personal computers were becoming commercially available for household consumers.

The early PCs were practically just toys for a few simple games and maybe some word processing. These were mostly marketed entirely to men and boys. It initiated social norms for computers to be primarily for boys, defining who the ‘geeks’ were, and creating techie culture. This eventually led to discrepancy where parents were less likely to purchase a computer for their daughters, while more inclined to purchase one for their sons. Since the girls were getting less exposure during their early years, they weren’t as interested in careers related to computer science. The small percentage that may have chosen computer science would also feel a disadvantage when compared with boys who probably had grown up with experience with computers.

Any opinions on the matter or how to help promote more women to pursue coding careers? Have a say in the comments below.

Sources:

When Women Stopped Coding

Veteran's Day: Honoring the Women Who Wrote Computer Programs to Win WWII

Viewing all 2372 articles
Browse latest View live


Latest Images