Quantcast
Channel: Infragistics Community
Viewing all 2363 articles
Browse latest View live

jQuery Grids with Multi-Column Headers

0
0

jQuery Grids Multi-Column HeadersIf you’ve been reading the latest blog about the Column Moving feature of the Ignite UI Grid I’ve briefly mentioned Multi-column Headers. Well, just in case you missed it – that’s a fairly recent addition too! Through a very simple (and logical I think) setup of columns and layouts, this feature allows for visual and sometimes functional grouping of column headers under a common parent.

While on its own it might be mostly a visual thing, having other parts/modules of the Ignite UI Grid and Hierarchical Grid being aware of it, it can have some really interesting interactions. These might not be part of the actual widgets code, but they are a by-product of having column headers grouped while using other features. And below I’ll be throwing some more feature names at you for reference in one place.

Lastly if you are in for a quick start with the whole toolset and related concepts you can Get Started Learning Ignite UI Today! I could not resist the awesome contained in there and now, with the shameless plug done with, let’s move on to the basics of the feature.

Quick Start

After all you need to start somewhere and if you are like me and just straight to the API to check out capabilities, you are in for a slight shock. As it stands, the Multi-Column Headers widget doesn’t really offer much. So how do you set it up? Well it all becomes very reasonable when you begin to thing about the widget itself as an on/off switch (which is exactly what it does) and the column definitions are where they always were.. in the column collection! You can simply add one that has a collection on it’s own assigned to its ‘group’ property. Inside you can have more columns with groups and so on – the feature should allow for virtually unlimited nested headers. Then you also have some additional properties like a key and row span. A partial snippet with the ASP.NET MVC Helper (important lines are 5 and 6):

  1. @(Html.Infragistics().Grid<MultiColumnHeaders.Models.Department>()
  2.     .Columns(column =>
  3.     {
  4.         column.For(x => x.DepartmentID).HeaderText("DEP Id");
  5.         column.MultiColumnHeader("Dep").HeaderText("Dep")
  6.             .Group(innerColumn =>
  7.             {
  8.                 innerColumn.For(x => x.Name).HeaderText("Name");
  9.                 innerColumn.For(x => x.GroupName).HeaderText("GroupName");
  10.             });
  11.     })
  12.     //...

And it’s as simple in script(line 9):

  1. $('#grid').igHierarchicalGrid({
  2.     columns: [{
  3.         key: 'DepartmentID',
  4.         dataType: 'number',
  5.         headerText: 'DEP Id'
  6.     }, {
  7.         key: 'Dep',
  8.         headerText: 'Dep',
  9.         group: [{
  10.             key: 'Name',
  11.             dataType: 'string',
  12.             headerText: 'Name'
  13.         }, {
  14.             key: 'GroupName',
  15.             dataType: 'string',
  16.             headerText: 'GroupName'
  17.         }]
  18.     }],
  19.     //..

For the above layouts to work simply add the “MultiColumnHeaders” feature to the respective collection:

  1. //....
  2. .Features(feature => feature.MultiColumnHeaders().Inherit(true))
  3. //  ---- OR -----
  4.  features: [{
  5.             name: 'MultiColumnHeaders'
  6.         }],
  7. //...

You have two options here as usual when it comes to the Hierarchical Grid – you can define the feature in the parent’s collection and allow inheritance or add it to the specific layout. Overall you can check out the igGrid Multi-Column Header topics in our help they already contain a fairly detailed guide. Or you can also refer to the samples and demos section below and learn by example :)

Not so fast!

First off, let’s have a little bit of understanding of what exactly the feature does it modifies the markup in the THEAD of the Grid table. The Multi-Column Headers feature provides out-of-the-box alignment - as you’d expect much of it revolves around figuring out the perfect way to align actual column headers in there – setting “colspan” and row spans, the latter you can tweak (more on that below). The only required setting really is the group collection, really. Well, I guess the header text is also really nice to have, because  you’ll end up with header saying ‘undefined’ otherwise.

Then there’s also the key. Unlike your usual column settings, the key in this case doesn't correspond to a data property. So why would you need it? When you don’t assign a multi-column header a key(which doubles as identifier) you will be stuck with whatever the grid comes up with on its own. That means that the identifiers will be generated (incrementing number id) and these don’t always get assigned as you’d expect. Furthermore, perhaps you’ve seen some methods – particularly with API that manipulate columns like Hiding and Moving – that do accept multi-column identifiers/keys. Lacking a key can sometimes cause odd behavior, so it’s best if you consider it required as well. In addition, you don’t want to be missing on the opportunity for easy header targeting:

The THEAD markup generated for the Multi-Column Headers with levels and id-s

When you define a key the headers will also be assigned id-s (combination of the Ignite UI Grid’s Id and the column’s) that you can use for super fast and easy targeting. This puts those headers in line with the data-bound ones you see with “data-isheadercell” attribute set to true.

The good and evil row spans

The ‘rowspan’ property is a direct reference to the underlying table cell property, however the feature itself figures out the alignment of cells in rows (in order to have them span and align the way you’d expect rows sometimes end up containing both data bound and group headers). So there are some ‘gotcha’-s right here. For example take the case below (some columns are hidden and other squished so they can fit in the shot) where we set the “Record Info” group header from it’s original single row span to two in order to push its child column lower and align them with the rest.

An example of the effect of the rowspan property of the MUlti-Column Headers

Notice how the intention to merely align all the ‘actual’ headers in a neat row resulted in enlarging the entire header table. Because this aligned the last two column headers with the rest in a neat row, they really actually ended up in the same table row in markup. And since those were slightly bigger with more text the row expanded to fit them, causing the stretch. Also if you define row spans for columns that don’t have anything else to take up the space or not enough space to fit the rest you can end up needing to compensate elsewhere to avoid skewed layout. Generally, I’d suggest relying on the grid to do that for you. 

More on the API

As you can see duly noted in the documentation the feature’s own getMultiColumnHeaders should be used in order to get the headers and their groups, as if you get the igGrid widget columns collection using $(“.selector”).igGrid(“option”, “columns”) you will get the ‘actual’ ones only – no group hierarchy.

It’s a similar case with the hierarchical grid, but for different reasons. You can actually pull the column options as usual and they will contain the group headers and their children, however that’s only good if you need to check out the header hierarchy. For the additional info, such as col/row span, identifier or level you should again rely on thegetMultiColumnHeaders method.

There’s another method, that oddly enough the API is missing, but the documentation doesn’t and I figured it’s good to mention – it’s called "renderMultiColumnHeader" and it takes the very same column collection you’d provide for grid initialization. With it you can change the Multi-column  headers’ arrangement in runtime or even define columns without any – just keep in mind it costs a grid rebind. It’s fairly simple to use too:

$('#Grid1').igGrid("renderMultiColumnHeader", [{
key: 'DepartmentID',
dataType: 'number',
headerText: 'DEP Id'
}, {
headerText: "Dep",
group: [
//...
]
}]);

There are other setting you’d normally see in the API that are shared for all columns (less so with the ASP.NET MVC helpers) that you might set, but will be generally ignored (templates, formatters and such don’t make much sense there). There are some that would, but still will not apply – e.g. the width property. The width of the multi-column header is determined by it’s group and in order to define width for it you just have to set it up on the child columns.

Styling

The feature applies a single specific class(“ui-iggrid-multiheader-cell”) to the headers you can target with CSS. This allows for specific styles to differentiate the group headers from the rest, which is something that I think the default Infragistics theme needs. You can do anything really, but I decided a subtle underline will do quite nicely (which I totally stole from the Modern UI theme!) so with the following style:

  1. .ui-iggridth.ui-iggrid-multiheader-cell {
  2.     border-bottom-color: #2cbdf9;
  3.     border-bottom-width: 1px;
  4. }

An example of applying styles targeted at only the Multi-Column Headers

You get something similar to this. You can even use some pseudo-classes to alternate between styles in case you have more groups, which I’ve also done in my samples so check them out below.

Feature interaction

I’ve already mentioned in my last blog Column Moving is playing well with multi headers. And as you can imagine the parent headers can also be dragged in order to move all their children  at once. So what else interesting?

With the Hiding Feature you get a nice icon on the header to use to hide the entire group and parent will go away if all nested columns are hidden. You can also simply set the ‘hidden’ property of the column to hide it by default and that part doesn’t even require the respective feature to work (but it will lack UI and Interactions to show the columns without).

Both features’ API methods that perform column operations will also accept multi-column header identifier in place of the key.

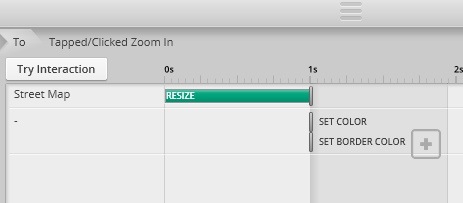
When Resizing the user can interact both with individual columns or with their group header both leading to a satisfactory reactions – resizing nested columns will modify the parent’s width and vice versa.

In terms of UI, both Hiding and Column Moving produce their distinctive header icons for interaction, as seen on the topmost image of the blog. Unlike data-bound columns that accumulate additional features in a single gear icon, the group ones doesn’t support more than the two above and therefore don’t get a feature chooser! That might change as more features that make sense to be bulk-performed are added to the Grids (*hint hint* might happen very soon too).

Resources

Donwload your Ignite UI Free Trial now!

I’d love to hear some thoughts, so leave a comment down below or @DamyanPetev.

And as always, you can follow us on Twitter @Infragistics and stay in touch on Facebook, Google+ and LinkedIn!


Windows Azure Boot camps (Melbourne, Sydney & Brisbane)

0
0

Microsoft is running Windows Azure boot camps around Australia. These are one day events that will help get you on the fast track to developing with the cloud.

The registration page with information on the times, agenda for the day, etc. can all be found at http://6weeksofazure.azurewebsites.net/about-6-weeks/agenda/

Melbourne
16 March 2013
Monash University Law Chambers, Marsh Building
555 Lonsdale Street

Sydney
23 March 2013
Microsoft Offices
1 Epping Road

Brisbane
27 March 2013
Cliftons
288 Edward Street

Unfortunately I am in different states when each of the events are on, so I won’t be able to assist with these events :-(

By David Burela

Simulating a DatePicker in Indigo Studio

0
0

Simple Date Picker Simulation

Although we had a date picker in an early alpha of Indigo, it had to be cut for V1 release. We do know it is a common/useful control, so it will make its way back into the toolbox. To expedite that, you can vote for it here.

In the meantime, it's not hard to simulate picking from a date picker with Indigo. The "Rove" sample that ships with Indigo illustrates one way to do this, but you can also do a simple simulation using a Textbox, Icon (the Calendar one), an image of your favorite date picker (like the Infragistics Ignite UI date picker), and a couple simple interactions.

1. Add a Textbox and Icon, picking the Calendar icon from the available icons. Position them together. You can increase the size of the Textbox by changing its font size if you want.

2. Add a Taps/Clicks interaction to the icon (you can rename it to Date Picker if you want the state auto named Tapped/Clicked Date Picker).

3. Drop in your favorite date picker calendar image and position it below the text box (shown above).

4. Add a Taps/Clicks interaction to the calendar image.

5. Type in the date you want to simulate picking into the Textbox.

That's it. You can optionally, fade in/out the calendar by just resizing the Add and Remove on the timeline. You can see all of this in action and also download the sample screen to poke around with it in Indigo.

Of course, having a "real" date picker will be nifty and nice, but for the purposes of sketching prototypes, maybe this technique will help you.


About Indigo Studio

If you haven’t already, why not Go Design Something!? Version 1 is free forever.

If you are using Indigo, we welcome your ideas on how we can better apply and refine these and other good interaction design principles to help you to design awesome UIs. If you have any questions or problems, please don’t hesitate to discuss them with us in our forums. We’re also on Twitter @indigodesigned.

About the Author

Ambrose Little is principal design technologist at Infragistics and has worked on Indigo Studio as interaction designer and product manager along with an awesome team based here in Cranbury, NJ, USA and Montevideo, Uruguay.

Infragistics Parsing Framework - Removing Ambiguities, Part 3

0
0

This post is part of a series on the parsing framework provided by Infragistics starting in version 12.2. The previous post in the series can be found here.

In the previous posts about ambiguities, I discussed the conflicts which can occur while parsing but only showed examples of local ambiguities. Other than the performance implications, you really don’t have to worry about local ambiguities because the parser will eventually figure things out as it reads more tokens from the lexer. But with global ambiguities, things get more complicated because the same tokens can be interpreted in two or more different ways.

There are many ways to produce a globally ambiguous grammar, some of which are not so obvious. Let’s look at a simple grammar which can produce a global ambiguity:

  1. S → x y z
  2. S → x A z
  3. A → y

This grammar has a shift/reduce conflict if the lexer provides the tokens <x><y><z>. The “z” symbol moves the parser along in production 1, but it is also is a valid look-ahead to reduce “A” because production 3 is complete. Recall that a reduce operation is when the body of a production has been read completely, the next token is something that can legally follow the symbol at the head of that production, and so a parent node can be created to represent the head symbol in the syntax tree. Productions 1 and 2 can both represent the total content of the document, so two syntax trees will be generated.

Sometimes global ambiguities cannot be avoided. The language may be inherently ambiguous. C# is an example of such a language. The method invocation “A(B<C,D>(E+F))” can either have two parameters which are Boolean expressions or a single parameter which is an invocation of generic method B. In ambiguous languages, it is a good idea to tell the parser which interpretation to use in ambiguous situations because otherwise, the parser will arbitrarily pick one. As I mentioned in my first post, this type of situation can be handled by setting HasPriority on one of the non-terminal symbols. In 12.2, this was the only way to handle a global ambiguity. The parser will look to see which sub-tree has a priority node at the highest level and choose that one. In 13.1, we have also added some APIs to allow for code to decide which interpretation gets used. I’ll discuss these as the 13.1 release gets closer.

However, even if the language is not ambiguous, it is possible to make ambiguous grammars to describe it. This can be done unintentionally if the grammar writer is not careful and allows for the same content to be parsed in multiple ways, even if that content is empty. Consider the following EBNF grammar:

S = [A];
A = [x];

This grammar creates the following productions (because the square brackets contain optional sequences):

  1. S
  2. S → A
  3. A
  4. A → x

Now if an empty document is parsed, there are two possible trees:

In the first interpretation, the empty version of the start symbol is used (production 1). In the second interpretation, the version of the start symbol with a single “A” is used (production 2) and that “A” is empty (production 3). There are a few ways to fix this. One way is to remove the optional brackets around “x” from the “A” symbol definition. However, if “A” is used in other contexts, each usage of “A” will have to be made optional, which may not be ideal. Another way to handle this is to split the optionality of “A” with the actual symbols that can be used:

S = AOptional;
AOptional = [ARequired];
ARequired = x;

Now each symbol which was using “A” can use either “AOptional” or “ARequired” depending on whether it was optional or not. A third way to handle this is to remove the optional brackets from the usage of “A” in the start symbol:

S = A;
A = [x];

The only side-effect to this solution is that an “A” node will always be in the syntax tree, whether the document contains an “x” or not. This may or may not be ok depending on your logic which processes the tree.

Let’s looks at a slightly more complex global ambiguity (remember that curly braces indicate a sequence which can be repeated 0 or more times):

S = {A};
A = [x];

Similar to the previous example, this one allows for multiple ways of interpreting an empty document, but it also allows for multiple ways of interpreting documents with content. To see why, let’s look at the productions created by this grammar (remember that repetitions generate hidden recursive symbols to represent them):

  1. S → S1
  2. S1
  3. S1→ S1 A
  4. A
  5. A → x

Now if an empty document is parsed, there are two possible trees (the hidden S1 nodes are shown here even though they won’t appear in the final syntax tree):

In the first interpretation, the empty version of the repetition is used. In the second interpretation, the version of a repetition with a single “A” is used and that “A” is empty. Actually, it is theoretically possible for an infinite number of ambiguous trees to be generated here. An empty document can be interpreted as N “A” symbols for any value of N, all of which are empty, but our parser implementation does not generate these extra trees.

Now let’s look at the trees generated when a single “x” is present in the document:

And again, an infinite number of trees could be generated in this case, but these are the only trees actually generated by our parser.

So how can we fix this? Well, some of the same solutions from the previous example can be used here as well. You can make “A” always contains an “x” and then make all other usages of “A” optional if they are not in a repetition. Or you could separate “A” into required and optional content:

S = {ARequired};
AOptional = [ARequired];
ARequired = x;

We can also take this type of ambiguity to the next level – a repetition of repetitions:

S = {A};
A = {x};

I won’t go through the examples of ambiguous trees for this one, but you can imagine how this grows in complexity from the previous example.

These examples were all theoretical, but next time we’ll see some real world global ambiguities which can occur when writing grammar rules for arithmetic operator expressions. Then I’ll demonstrate how a different set of grammar rules can create non-ambiguous parses which actually arrange the nodes in the syntax tree in a way which reflects the precedence levels of the operators.

By Mike Dour

The information contained herein is provided for reference purposes only.

Copyright © 2013 Infragistics, Inc., All Rights Reserved.

iOS Tips and Tricks: Associate a File Type with your App - Part 3

0
0
Part 1: Standard File Extensions Part 2: Custom File Extensions In this final part of the series we'll finally learn how to react to those files being added to your project. Step 1. Open your AppDelegate.m file. Step 2. Add the following method: -(BOOL)application:(UIApplication *)application openURL:(NSURL *)url sourceApplication:(NSString *)sourceApplication annotation:(id)annotation Step 3. Now, when you import a file, that method will get called. The file is actually stored in a folder called...(read more)

XamDockManager–An Updated Prism Region Adapter

0
0

Last September, I wrote what has become a very popular Prism region adapter for the Infragistics XamDockManager control.  As pointed out in the post, this original XamDockManager Prism region adapter didn’t support all scenarios.  Frankly, it’s difficult to write a custom region adapter without knowing every usage of the control.  After receiving tons of requests for features and questions on how to implement certain scenarios, I have updated and refactored the XamDockManager Prism region adapter to support the most common requests.

So what was added?

  • Support for Activation – Before, there region adaptor supported IActiveAware from the View and ViewModel perspective.  Whenever a View or ViewModel was activated, the IActiveAware interface members would be invoked.  Unfortunately, the activated View would not become the active docking tab.  Now when you use the Region.Activate method within your code, the view being activated will now become the active docking tab.
  • Support for Remove – Before, when you would call the Region.Remove method, the view would be removed from the region, but the docking pane would still be visible.  The view would not be removed from the XamDockManager control itself.  This was because initially the requirements specifically didn’t support this.  I assumed closing of the panes would occur by the user clicking on the close button of the pane.  Now, whenever you invoke the Region.Remove method, the view will be removed from the region as well as the XamDockManager.  This was a highly request feature.
  • Support for floating panes – Before, the adapter didn’t have any support for floating panes.  Basically everything would work fine until you started tearing off panes and placing them in a floating state, or started to create complex nesting and stacking of panes.  Now, no matter how you have your panes organized, Region.Activate and Region.Remove will properly activate or remove the View form the region as well as the XamDockManager control.  This was by far the most requested feature.

The Old RegionAdapter

This was the structure before:

  1. TabGroupPaneRegionAdapter
  2. TabGroupRegionBehavior
  3. IDockAware

The bulk of the work occurred in the TabGroupRegionBehavior class.  Well, that isn’t the recommended way to write region adapters.  It only turned out that way because I started to write it to get it to work, and never went back to change it.  I just kept writing code and didn’t want to take the time to refactor it to the way I preach writing region adapters.  So I just posted it as it was.  Well, as it turns out, this example was used more as gospel, rather than a simple “here is an example”.  Meaning, that people would use it as “this is how you write all region adapters”.

The New RegionAdapter

Here is the new structure:

  1. TabGroupPaneRegionAdapter
  2. TabGroupPaneRegionActiveAwareBehavior
  3. IDockAware

As you can see, the only thing that really changed was the removal of the TabGroupRegionBehavior.  It was replaced with the TabGroupPaneRegionActiveAwareBehavior which I will explain in a little bit.  This is the recommended way to create a region adapter.  You want to actually handling the adding of views in the Adapt method of your region adapter.

TabGroupPaneRegionAdapter

The TabGroupPaneRegionAdapter is the actual RegionAdapter that gets registered in the Bootstrapper of your prism application.  Now the bulk of the work is move here.  Where it belongs.  It’s implementation is as follows:

publicclassTabGroupPaneRegionAdapter : RegionAdapterBase<TabGroupPane>
{
    ///<summary>
    /// Used to determine what views were injected and ContentPanes were generated for
    ///</summary>
    privatestaticreadonlyDependencyProperty IsGeneratedProperty = DependencyProperty.RegisterAttached("IsGenerated", typeof(bool), typeof(TabGroupPaneRegionAdapter), null);

    privateIRegion _region;
    privateTabGroupPane _regionTarget;
    privateXamDockManager _parentDockManager;

    public TabGroupPaneRegionAdapter(IRegionBehaviorFactory regionBehaviorFactory)
        : base(regionBehaviorFactory)
    {
    }

    protectedoverridevoid Adapt(IRegion region, TabGroupPane regionTarget)
    {
        if (regionTarget.ItemsSource != null)
            thrownewInvalidOperationException("ItemsSource property is not empty. This control is being associated with a region, but the control is already bound to something else. If you did not explicitly set the control's ItemSource property, this exception may be caused by a change in the value of the inherited RegionManager attached property.");

        _region = region;
        _regionTarget = regionTarget;
        _parentDockManager = XamDockManager.GetDockManager(regionTarget);

        SynchronizeItems();

        region.Views.CollectionChanged += Views_CollectionChanged;
    }

    protectedoverridevoid AttachBehaviors(IRegion region, TabGroupPane regionTarget)
    {
        base.AttachBehaviors(region, regionTarget);

        if (!region.Behaviors.ContainsKey(TabGroupPaneRegionActiveAwareBehavior.BehaviorKey))
            region.Behaviors.Add(TabGroupPaneRegionActiveAwareBehavior.BehaviorKey, newTabGroupPaneRegionActiveAwareBehavior { HostControl = regionTarget });
    }

    protectedoverrideIRegion CreateRegion()
    {
        returnnewSingleActiveRegion();
    }

    void Views_CollectionChanged(object sender, NotifyCollectionChangedEventArgs e)
    {
        if (e.Action == NotifyCollectionChangedAction.Add)
        {
            //we want to add them behind any previous views that may have been manually declare in XAML or injected
            int startIndex = e.NewStartingIndex;
            foreach (object newItem in e.NewItems)
            {
                ContentPane contentPane = PrepareContainerForItem(newItem);

                if (_regionTarget.Items.Count != startIndex)
                    startIndex = 0;

                _regionTarget.Items.Insert(startIndex, contentPane);
            }
        }
        elseif (e.Action == NotifyCollectionChangedAction.Remove)
        {
            IEnumerable<ContentPane> contentPanes = _parentDockManager.GetPanes(PaneNavigationOrder.VisibleOrder);
            foreach (ContentPane contentPane in contentPanes)
            {
                if (e.OldItems.Contains(contentPane) || e.OldItems.Contains(contentPane.Content))
                    contentPane.ExecuteCommand(ContentPaneCommands.Close);
            }
        }
    }

    ///<summary>
    /// Takes all the views that were declared in XAML manually and merges them with the region.
    ///</summary>
    privatevoid SynchronizeItems()
    {
        if (_regionTarget.Items.Count > 0)
        {
            foreach (object item in _regionTarget.Items)
            {
                PrepareContainerForItem(item);
                _region.Add(item);
            }
        }
    }

    ///<summary>
    /// Prepares a view being injected as a ContentPane
    ///</summary>
    ///<param name="item">the view</param>
    ///<returns>The injected view as a ContentPane</returns>
    protectedvirtualContentPane PrepareContainerForItem(object item)
    {
        ContentPane container = item asContentPane;

        if (container == null)
        {
            container = newContentPane();
            container.Content = item; //the content is the view being injected
            container.DataContext = ResolveDataContext(item); //make sure the dataContext is the same as the view. Most likely a ViewModel
            container.SetValue(IsGeneratedProperty, true); //we generated this one
            CreateDockAwareBindings(container);
        }

        container.CloseAction = PaneCloseAction.RemovePane; //make it easy on ourselves and have the pane manage removing itself from the XamDockManager
        container.Closed += Container_Closed;

        return container;
    }

    ///<summary>
    /// Executes when a ContentPane is closed.
    ///</summary>
    ///<remarks>Responsible for removing the ContentPane from the region, any event handlers, and clears the content as well as any bindings from the ContentPane to prevent memory leaks.</remarks>
    ///<param name="sender"></param>
    ///<param name="e"></param>
    void Container_Closed(object sender, Infragistics.Windows.DockManager.Events.PaneClosedEventArgs e)
    {
        ContentPane contentPane = sender asContentPane;
        if (contentPane != null)
        {
            contentPane.Closed -= Container_Closed; //no memory leaks

            if (_region.Views.Contains(contentPane)) //we are dealing with a ContentPane directly
                _region.Remove(contentPane);

            var item = contentPane.Content; //this view was injected and set as the content of our ContentPane
            if (item != null&& _region.Views.Contains(item))
                _region.Remove(item);

            ClearContainerForItem(contentPane); //reduce memory leaks
        }
    }

    ///<summary>
    /// Checks to see if the View or the View's DataContext (Most likely a ViewModel) implements the IDockAware interface and creates the necessary data bindings.
    ///</summary>
    ///<param name="container"></param>
    void CreateDockAwareBindings(ContentPane contentPane)
    {
        Binding binding = newBinding("Header");

        //let's first check the view that was injected for IDockAware
        var dockAwareContent = contentPane.Content asIDockAware;
        if (dockAwareContent != null)
            binding.Source = dockAwareContent;

        //fall back to data context of the content pane.
        var dockAwareDataContext = contentPane.DataContext asIDockAware;
        if (dockAwareDataContext != null)
            binding.Source = dockAwareDataContext;

        contentPane.SetBinding(ContentPane.HeaderProperty, binding);
    }

    ///<summary>
    /// Sets the Content property of a generated ContentPane to null.
    ///</summary>
    ///<param name="contentPane">The ContentPane</param>
    protectedvirtualvoid ClearContainerForItem(ContentPane contentPane)
    {
        if ((bool)contentPane.GetValue(IsGeneratedProperty))
        {
            contentPane.ClearValue(ContentPane.HeaderProperty); //remove any bindings
            contentPane.Content = null;
        }
    }

    ///<summary>
    /// Finds the DataContext of the view.
    ///</summary>
    ///<param name="item"></param>
    ///<returns></returns>
    privateobject ResolveDataContext(object item)
    {
        FrameworkElement frameworkElement = item asFrameworkElement;
        return frameworkElement == null ? item : frameworkElement.DataContext;
    }
}
TabGroupPaneRegonActiveAwareBehavior

The TabGroupPaneRegionActiveAwareBehavior is responsible for supporting Activation and Deactivation.

publicclassTabGroupPaneRegionActiveAwareBehavior : RegionBehavior, IHostAwareRegionBehavior
{
    publicconststring BehaviorKey = "TabGroupPaneRegionActiveAwareBehavior";

    XamDockManager _parentDockManager;

    TabGroupPane _hostControl;
    publicDependencyObject HostControl
    {
        get { return _hostControl; }
        set { _hostControl = valueasTabGroupPane; }
    }

    protectedoverridevoid OnAttach()
    {
        _parentDockManager = XamDockManager.GetDockManager(_hostControl);
        if (_parentDockManager != null)
            _parentDockManager.ActivePaneChanged += DockManager_ActivePaneChanged;

        Region.ActiveViews.CollectionChanged += ActiveViews_CollectionChanged;
    }        

    void DockManager_ActivePaneChanged(object sender, RoutedPropertyChangedEventArgs<ContentPane> e)
    {
        if (e.OldValue != null)
        {
            var item = e.OldValue;

            //are we dealing with a ContentPane directly
            if (Region.Views.Contains(item) && Region.ActiveViews.Contains(item))
            {
                Region.Deactivate(item);
            }
            else
            {
                //now check to see if we have any views that were injected
                var contentControl = item asContentControl;
                if (contentControl != null)
                {
                    var injectedView = contentControl.Content;
                    if (Region.Views.Contains(injectedView) && Region.ActiveViews.Contains(injectedView))
                        Region.Deactivate(injectedView);
                }
            }
        }

        if (e.NewValue != null)
        {
            var item = e.NewValue;

            //are we dealing with a ContentPane directly
            if (Region.Views.Contains(item) && !this.Region.ActiveViews.Contains(item))
            {
                Region.Activate(item);
            }
            else
            {
                //now check to see if we have any views that were injected
                var contentControl = item asContentControl;
                if (contentControl != null)
                {
                    var injectedView = contentControl.Content;
                    if (Region.Views.Contains(injectedView) && !this.Region.ActiveViews.Contains(injectedView))
                        Region.Activate(injectedView);
                }
            }
        }
    }

    void ActiveViews_CollectionChanged(object sender, NotifyCollectionChangedEventArgs e)
    {
        if (e.Action == NotifyCollectionChangedAction.Add)
        {
            FrameworkElement frameworkElement = e.NewItems[0] asFrameworkElement;
            if (frameworkElement != null)
            {
                ContentPane contentPane = frameworkElement asContentPane;
                if (contentPane == null)
                    contentPane = frameworkElement.Parent asContentPane;

                if (contentPane != null&& !contentPane.IsActivePane)
                    contentPane.Activate();
            }
        }
    }
}
IDockAware

Hasn’t changed a bit.

publicinterfaceIDockAware
{

    string Header { get; set; }

}

The New Region Adapter in Action

Nothing here has really changed from the original post either.  You register the region adapter the same way as before in your bootstrapper.

protectedoverride Microsoft.Practices.Prism.Regions.RegionAdapterMappings ConfigureRegionAdapterMappings()
{
    RegionAdapterMappings mappings = base.ConfigureRegionAdapterMappings();
    mappings.RegisterMapping(typeof(TabGroupPane), Container.Resolve<TabGroupPaneRegionAdapter>());
    return mappings;
}

I did update the sample application to make it a little more involved.

XamDockManager Prism Region Adapter

As you can see, there is now a list of data in a XamDataGrid.  When you double click on a row, a view will be injected into the XamDockManager.  There are buttons in the menu that will allow you to select a view in the XamDataGrid and activate it, as well as remove it from the region.

XamDockManager Prism Region Adaptor for floating windows

Feel fee to rearrange your panes to make them as complicated and nested as you want.

Disclaimer: the sample app is just a demo application that is meant to show the functionality of the XamDockManager region adapter and is not meant to mimic a production application with coding best practices or guidance.  It’s coded to just make it work.

Watch out for this Gotcha!

There is one thing you need to be aware of when declaring a TabGroupPane as a region.  Let’s assume you define your region like this:

<igWPF:TabGroupPane prism:RegionManager.RegionName="{x:Static inf:KnownRegionNames.TabGroupPaneOne}">

</igWPF:TabGroupPane>

Now you start injection views into your cool region, and you remove a couple and add some more.  Everything seems to be working fine until you remove all views from the region.  Now, the next time you try to add a view to this empty region you will get an exception.  Why? When you remove all views from the TabGroupPane, then pane is removed from the XamDockManager, hence effectively deleting the region you defined.  So how do you get around that?  Easy!  Just give it a name.

<!-- Give the TabGroupPane a name with the x:Name attribute so that the region
     is not destroyed when all views have been removed from the region -->
<igWPF:TabGroupPane x:Name="_tabGroupPaneOne"
                    prism:RegionManager.RegionName="{x:Static inf:KnownRegionNames.TabGroupPaneOne}">

</igWPF:TabGroupPane>

Giving the TabGroupPane a name will prevent the pane from being removed from the XamDockManager when it is empty.  Now you can continue to add and remove views without fear of crashing your application.

Feel free to download the new and improved XamDockManager Prism region adapter with sample source code.  If you have any questions feel free to contact me through my blog, on twitter (@BrianLagunas), or leave a comment below.

Galaxy S4 And The Quest For The Perfect Retina Display

0
0

The new Samsung Galaxy S4 has some nice features:

  • Hover state. This is made possible through the phone recognizing the proximity of your finger towards the screen surface. This is not new, Sony’s Xperia Sola introduced this technology last summer already. It went pretty much unnoticed then. But I still think this is big. The lack of a hover state on gesture-based devices has always been problematic, especially for cross-device / responsive designs. For those, on a large form factor you had a mouse and could hover, but then on a tablet or smartphone you only had your finger and no hover. Instead, the established interaction pattern was tap and hold. Now with the same interaction the user experience is consistent.
  • Touchless gestures: you can swipe, for example to page through a stack of photos, without touching the display.
  • Simple eye tracking: when you play a movie and look away from the phone, the movie is automatically paused and only resumes when you look book on the screen.
  • Pixel resolution: 441 ppi (pixels per inch).

Let’s check out the last bullet in more detail. If the iPhone 5 already features a retina display with its 326 ppi, then the Galaxy S4’s pixel resolution of 441 ppi at first sounds like an overkill. It’s like trying to make silence more silent or something black blacker.

Is the Galaxy display just a gimmick feature or a substantial improvement over the iPhone 5? The answer is: it depends how close you hold your phone to the face. A typical viewing distance is 12 inches. Here’s what that looks like.

User holding phone in 12 inch distance


For the standard 12 inch viewing distance there is no perceivable difference between the S4 and the iPhone5. The reason is that for this distance our eyes cannot resolve anything higher than 287 ppi (see here for details). Therefore, the iPhone 5 with its 326 ppi is already overkill. But then, things change when the viewing distance is shortened. As you bring the device closer to your eyes, you need higher pixel densities to avoid seeing individual pixels. The iPhone 5 has enough pixels per inch for you to move your phone 2 inches closer to a viewing distance of 10 inches.

User holding phone in 10 inch distance


With the Galaxy S4 you can reduce that distance by another 2 inches and still don’t see individual pixels. You then have a viewing distance of 8 inches like shown in the picture below.

User holding phone in 8 inch distance 

The question is whether it makes a difference to people if they can hold their phones 8 or 10 or 12 inches away from their faces. If 12 inches are indeed the normal viewing distance (and that’s what I see in technical publications), would users actually want to hold the phone closer than that? And where does it end? Are 8 inches enough? Or 6 inches? Is the goal to come up with an uber-retina display that you can look at from a distance of 1 inch and still don’t see individual pixels?  Yes, when it comes to pixel resolution that seems to be the trend. 

The reality is that without assistive technology we cannot see anything sharp that’s closer than about 3 inches. And that short distance we can only cope with as kids and teenagers. By age 30 that so called  near point is already at 4 inches, by age 45 it’s at around 10 inches (see chart below). Without glasses people will then hold their phones farther away from the eyes in order to see things sharp. At age 50 the arm is not long enough and eye correction (e.g. reading glasses) is the only way to bring the near point closer again.


Chart showing near point for difference ages

      Grandjean, E. (1987). Ergonomics in Computerized Offices. London: Taylor & Francis. Page 21.


Persons younger than about 40, whose near point is still closer than 8 inches may move the phone closer than 8 inches in which case they would see individual pixels. In that case not even the Galaxy S4 would provide a high enough pixel resolution.

If we cannot see things sharp that are closer then 3 inches, then the “perfect” retina display would allow its users to bring it as close as 3 inches to their eyes and they wouldn’t see individual pixels. Like the picture below demonstrates, 3 inches is really close, so it’s clearly an edge case even for very young users. Yet, since less pixels per inch are required for larger viewing distances, no user - no matter of his/her age - would be able to tell individual pixels apart – hence the ”perfect” retina display.

User holding phone in 8 inch distance


What pixel resolution would it take? You would need to pack about 3 times more pixels into the S4 than its display currently has: a pixel resolution in the neighborhood of 1,320 ppi. More pixels per inch you would only need if the UI would be magnified. That could be the next race for higher pixel density…

Triangle .NET User Group March Meeting Follow-up

0
0

The second stop on my Brent Goes South For the Winter Tour was the Triangle .NET User Group (TriNUG) Main Meeting for March.  The meeting was on March 13, 2013 at Microsoft’s Research Triangle Park Office. 

Meeting recap

I made a rough count at the beginning of the session and there were roughly 60 people at the meeting.  I gave my “Designing for Windows 8” talk, gave away a copy of Designing for Windows 8, and answered a lot of really great questions.

Many of the questions and concerns raised in the session were regarding learning Windows 8 as users.  I think Scott Hanselman has done a very good job of explaining Windows 8 with his post from January entitled "The Missing Windows 8 Instructional Video".  I would encourage everyone to watch this video if they are having concerns about Windows 8 usability.

Some concerns were also raised regarding larger screen sizes and Windows 8.  For more information on how to deal with screen sizes in your application design, check out this set of guidance on MSDN or read the section of Designing for Windows 8 that deals with designing for form factors.

Contact

If you have any questions or comments, please comment below or find me on Twitter @brentschooley.  You can also email me at bschooley@infragistics.com.


Orlando Code Camp Follow-up

0
0

The third stop on the Brent Goes South For the Winter Tour took me to the Orlando Code Camp 2013.  This event, hosted by the Orlando .NET User Group (ONETUG), was held at Seminole State College on March 9, 2013.  Infragistics sponsored the event and I was really excited to give a few presentations and spend some quality time at the Infragistics booth talking to all of the attendees.

orlandocc

Session #1: Creating iOS Apps Using C# with Xamarin.iOS

I love giving this session because the technology involved is very exciting and there’s a lot of interest in it.  I got a very good reminder of that on Saturday because the room was completely full and people were even sitting on the floor.  Here’s a picture of the room (yes, I used the panorama feature in iOS after someone in the crowd said “Why don’t you use panorama?!”…click for larger view):

orlandoxamarin-thumb

As I mentioned in my Roanoke Code Camp follow-up, I have been talkingaboutthis technology since it first launched.  It’s a great technology and I can tell people are definitely interested because of the amount of great questions that get asked during the session.  One piece of follow-up I wanted to provide those who were asking about pricing is regarding the multiple platform pricing.  I double-checked and there is a 10% discount if you get licenses for iOS and Android (or Mac) in the same purchase. 

Want more?  Infragistics has native iOS controls with bindings for Xamarin.iOS.  Check out my blog post for getting started with the NucliOS chart.  If you liked this session and want to see it again, a recorded webinar version of what was covered is available on YouTube.

Session #2: Designing for Windows 8

If my Speaking Engagements list is accurate, this is the 16th time I’ve given this session to either a user group or code camp.  I was a little rushed due to time constraints and the previous session running a bit long, but I still managed to get all of the material in there.  My apologies if it felt too rushed.  Here are some links to more information about this topic if you are interested:

  • Designing for Windows 8– Chapters 1, 2, and 6 take a deeper dive on the presentation material and chapters 3-5 cover additional topics not in the presentation itself
  • Helvetica– I mentioned that if you wanted to learn more about how type affects us and why, this is a great film to check out
  • design.windows.com– This is *the* place to go for all of Microsoft’s design documentation for Windows 8
  • Microsoft Design Style series– This is a series of blog posts I wrote about Microsoft Design Style

Summary

This was a really fun Code Camp.  The weather was amazing, the energy level was high, and the engagement at the booth was wonderful.  I’d like to thank the event staff for being very accommodating and helpful throughout.  Also, thank you to everyone who attended my sessions.

As I mentioned previously, I am also documenting things that happen on my tour outside of events over at brentschooley.com.  I’ll have some great things to post there soon from Orlando.

Contact

If you have any questions or comments, please comment below or find me on Twitter @brentschooley.  You can also email me at bschooley@infragistics.com.

TechEd India 2013: Infragistics Sessions & Sponsorship

0
0

Infragistics is continuing its tradition of supporting TechEd, the largest tech event in India that happens every year.  For 2013, TechEd is taking on a slightly different look than previous years – it is being held in multiple cities, both Bangalore& Pune are official TechEd sites.  As a follow on, there are a series of smaller, local events that will cover the TechEd content.  So everyone will have a chance to see the great content being presented this year.

This year, I will be doing 6 talks during TechEd week at various locations.

TechEd Bangalore

  • 3/18/2013: 11:45am - 12:45pm - User Experience Essentials for Designing Modern Apps
  • 3/19/2013: 1:45pm - 2:45pm - Building MVVM JavaScript Apps

Tech Days Delhi

  • 3/22/2013: 4:00pm-5:00pm - Building MVVM JavaScript Apps


C# Corner MVP Summit – Noida

  • 3/23/2013: 12:20pm - 1:00pm - HTML5 & jQuery / Ignite UI

TechEd Pune

  • 3/25/2013: 11:45am - 12:45pm - User Experience Essentials for Designing Modern Apps
  • 3/26/2013: 1:45pm - 2:45pm - Building MVVM JavaScript Apps


We also have a booth at each location, various folks from our team in the Bangalore office will be at each event.  Yesterday we had a booth frenzy when TechEd officially opened, here is a view of what it looked like.


For my talk on the “10 UX Essentials for Modern Apps”, the room was so full they needed to do an overflow in the hallway and an encore presentation was actually scheduled for later in the evening!


This week we are also a Gold Sponsor for the C# Corner MVP event.  This event was started a couple of years ago by local MVP’s and has grown into something pretty special.  I’m glad that Infragistics can be part of this event and take part in the vibrant MVP community in India.


If you are at TechEd India or at any of the events we'll be at this week, please stop by the booth or one of my sessions and say Hi, or just shoot me an email at jasonb@infragistics.com or get me on twitter @jasonberes.

Boise Code Camp 2013 Recap

0
0

Boise Code CampLast Saturday, we had the 7th annual Boise Code Camp which was held at Boise State University.  With over 60 sessions, 54 speakers from 5 different states, over 400 attendees, and 10.5 hours of community, this was one hell of an event.


It all started on Friday March 15th at the Fuddruckers in Boise with the speaker dinner.  This is where all the organizers, volunteers, and speakers get together to hang out and relax before the big show.  If you are involved in a code camp, you know all about stuffing the attendee bags.  Well, we put our speakers and volunteers to work by forming a line and stuffing the attendee bags with all the goodies.  All 475 of them.  It only took about 20 minutes to stuff them all.  The speaker dinner was awesome.  I got to meet old friends and make some new ones.  I always enjoy meeting first time speakers. 


FuddruckersBoise Code Camp Speaker dinner

Boise Code Camp Speaker dinnerBoise Code Camp Speaker dinner

The next day, Sat. March 16th, was the day of the big show.  I actually played three roles at Boise Code Camp.  I was an organizer, a speaker, and a sponsor.  I made sure to get there early, at around 7:00 am, so that I had time to setup the Infragistics booth.  I must say, my booth was freaking awesome!  If you like devices, touch screens, swag, free controls, and candy, then this was the booth for you.

Boise Code Camp Infragistics BoothBoise Code Camp Infragistics Booth

I had the following devices for you to tinker with and check out our awesome Infragistics controls:

  • Samsung BUILD tablet w/ Windows 8 Pro
  • Microsoft Surface w/ Windows RT
  • iPad 2
  • Kindle Fire
  • Nokia Lumia 800 (Windows Phone 7)
  • Nokia Lumia 920 (Windows Phone 8)
  • Lenovo W520 w/ Windows 8 Ent
  • Planar 27” touchscreen monitor (connected to the Lenovo)

One of the most popular devices was the Planar 27” touchscreen monitor.  It really made the Infragistics control shine.  My Windows 8 controls looked amazing and the touch response was phenomenal.  My booth literally had a line starting at 7:30 am well before breakfast was served.  Luckily my beautiful wife volunteered to help me run the booth.  By then end of the day, I had given away over 100 licenses, 100 t-shirts, and 3 bags of candy.

Boise Code Camp Infragistics BoothBoise Code Camp Infragistics Booth

Boise Code Camp Infragistics BoothBoise Code Camp Infragistics Booth

As I mentioned earlier, I also presented a session called “Building Composite XAML Applications with Prism”.  This is by far the most popular talk I give and the most requested.  It is a level 300 talk and is one of the more advanced topics.  Here is the description in case you were wondering.

“In this session you will learn how to design and build Windows Phone, Silverlight, and Windows Presentation Foundation (WPF) desktop applications using loosely coupled components that can evolve independently but which can be easily and seamlessly integrated into the overall application. This is an introductory talk that concentrates on the basic concepts required to build a composite application with the Microsoft Patterns and Practices Prism framework which includes the boostrapper, regions, modules, view composition, and different techniques for communicating between loosely couple components.  Various development patterns and technologies will also be discussed including Inversion of Control (IoC), Dependency Injection (DI), Unity, MEF (Managed Extensibility Framework), commanding, event aggregation, and MVVM (Model-View-ViewModel).”

For those of you who attended and want the sample code, look no further.

Download the Live Demo source code
Download the Prism DelegateCommand sample
Download the Prism CompositeCommand sample
Download the Prism EventAggragator sample

There was one talk that was more popular than mine.  Actually, it was the most popular talk in the entire Boise Code Camp schedule.  The title is “A Kid’s Guide to Programming”.  We had three speakers ages 6 to 12 present on programming languages for kids.  Unfortunately, we underestimated the popularity of the talk and placed it in a 50 person room.  Little did we know that 90 people would show up.  Standing room only!  Well, some had to sit on the floor as well.  First up was 12 year old Lily who did a great job giving an introduction to Scratch.  Next up was 12 year old Javier who showed us how to write games in Scratch using PONG as an example.  Last, but not least, was my 6 year old daughter Brianna who showed everyone how to draw a butterfly using Terrapin LOGO.

Boise Code Camp A Kid's Guide to ProgrammingBoise Code Camp A Kid's Guide to Programming

Boise Code Camp A Kid's Guide to ProgrammingBoise Code Camp A Kid's Guide to Programming

This was an amazing Boise Code Camp.  I would like to thank all the organizers, volunteers, speakers, and attendees for taking the time to make this event happen.  I also would like to thank our sponsors for providing all the swag, licenses, giveaways, and financial donations to make this event possible.  Next year will be our eighth Boise Code Camp, and we will try to make it the best ever.  I hope I will see you there.

If you have any questions or would like to get involved with Boise Code Camp as an organizer, volunteer, speaker, or sponsor, please contact me through my blog, contact me on Twitter (@brianlagunas), or leave a comment below.

SQLSaturday #188 Portugal Event Recap

0
0


Infragistics was presented at SQLSaturday Portugal by me by me as a speaker.
The event was held on Saturday, March 16th 2013 at Microsoft Portugal office, Lisbon.
It was the largest and best organized in Europe SQLSaturday until now.

Event Adminitrator was Niko Carvalho Neugebauer – PASS Community Evangelist and lead of the BITUGA - the Portugal PASS chapter.
There was also an interest in the  Infragistics solutions, related to Data Visualization and Business Solutions. Infragistics presentation samples for Windows Azure SQL Reporting includes solutions with WPF and ASP.Net MVC implemented with Infragistics components (NetAdvantage and Ignite UI). Hope in the near feature to have more closer contacts with professionals, community  members and companies from this region.


Summary:

There was 31 presentations in 5 tracks: Development, BI, DBA, mixed and other areas.

Infragistics participation in the event:

There was 1 technical presentation from Infragistics Inc.:

Windows Azure SQL Reporting for App developers : Mihail Mateev


Follow news from Infragistics for more information about new Infragistics events.

As always, you can follow us on Twitter @mihailmateev and @Infragistics and stay in touch on Facebook, Google+ andLinkedIn!

5 Graphic Design Tools You May Have Missed

0
0

One of the great things about the web is the sheer wealth of tools and services out there to help with almost any task. Developers and graphic designers are particularly well catered to. The trouble can be actually finding the products you should know about in the first place. Well maybe we can help! Here are 5 great design resources you might have overlooked:

1. What the Font

Ever wondered what particular font is being used in a design or website? Well stop guessing and try this great website. Simply upload an image and this website will try to match it from its pretty comprehensive database. It isn't perfect, but is getting better all the time, and a great forum helps fill the gaps.

2. Xara Xtreme

This desktop application, for Windows only, has long been blurring the gap between vector and bitmap programs. Xara started off creating design software for the Acorn range of desktops, and was briefly owned by Corel, before going solo again. One thing that hasn't changed in this time - consistently great software that is easy to use and packs a huge amount of power.

3. Skitch

Most operating systems offer a way to grab screenshots. Skitch makes the whole process as simple as possible, whilst adding a ton of useful features into the mix. A great power tool to call on when you need it.

4. FiveSecondTest

Ever wanted speedy feedback on your design? This site is designed to give you just that. Upload an image, set the type of feedback you are looking for, and see if your design passes the 'five second' test.

5. The Designers Toolbox

A handy resource of guidelines – from proofreading marks, to size comparisons, and binding options. You might not use it every day, but from time to time it will be invaluable.

9 Interactive Features of the Ignite UI igGrid

0
0

Thanks to all who attended yesterday’s webinar on 9 Interactive Features of the Ignite UI igGrid. There’s a lot packed into the grid and features highlighted in the webinar just scratch the surface on what the grid can do!

Demos Download

If you’re interested in working through the samples I used during the demo, you can download the code here. Please note that you’ll need to setup a virtual directory named ig_ui to host the js and css folder which have all the Ignite UI files in them.

What about the Grid?

There are three ways you can get access to the grid to run the samples:

  1. Use your existing licensed copy of Ignite UI
  2. Download a trial of Ignite UI
  3. Get igGrid for free! (this offer may not always be available)

Once you download the bits and setup the files in your virtual directory, the demos should work unaltered on your machine. The good news is that you can run them by just opening the HTML files from the file system or by running them through a web server.

Enjoy!

Infragistics Parsing Framework - Removing Ambiguities, Part 4

0
0

This post is part of a series on the parsing framework provided by Infragistics starting in version 12.2. The previous post in the series can be found here.

Defining binary operator grammar rules (as well as unary, ternary, and other arities) can be tricky and if not done correctly, can lead to global ambiguities all over the place. Let’s say we want to define a grammar for arithmetic expressions. And in this grammar, we only need to support addition and the only things which can be added are identifiers. Identifiers will be terminal symbols with the name “id”. One way to write the rules for this grammar would be as follows:

Expression =

id

| Expression, '+', Expression;

Now when presented with the text “x + y”, the following syntax tree would be generated:

However, if two or more additions are chained, the text becomes ambiguous. “x + y + z” could be interpreted in two different ways:

Now, other than the performance hit incurred when parsing ambiguities, this isn’t really a problem because addition is associative. The syntax tree on the left has the semantics of “(x + y) + z” and the syntax tree on the right has the semantics of “x + (y + z)”, both of which evaluate to the same result. So it would be ok to let the parser arbitrarily pick one of the trees. However, if we try to add support for multiplication, things get more complicated:

Expression =

id

| Expression, '+', Expression

| Expression, '*', Expression;

Now if the parser tries to analyze the text “x + y * z”, it will again create two ambiguous trees:

Now only one of these trees is valid. The syntax tree on the left has the semantics of “(x + y) * z”, which is incorrect, whereas the syntax tree on the right has the correct semantics of “x + (y * z)”. Therefore, when parsing arithmetic expressions, we always want the lower precedence operations to “own” the higher precedence operations. The nodes representing the lower precedence operations should appear higher in the syntax tree. One way to make sure the syntax tree always has this trait is to separate out the addition operation into its own non-terminal symbol and then mark it with HasPriority:

Expression =

id

| AdditionExpression

| MultiplicationExpression;

?<HasPriority>true</HasPriority>?;

AdditionExpression = Expression, '+', Expression;

MultiplicationExpression = Expression, '*', Expression;

However, this doesn’t prevent a global ambiguity from occurring. This just helps the parser decide which ambiguous tree should be chosen when the ambiguity does occur. So the performance hit is still incurred. Also, this only works with two precedence levels. Once there are three or more, there is no way to specify a precedence level for a non-terminal symbol. A non-terminal symbol either has priority or it doesn’t.

So what is the solution? The better way to do this is to write the rules in such a way so that there are no ambiguities and the lower precedence operations automatically own the higher precedence operations:

Expression =

P3;

P3 =

P2

| AdditionExpression;

AdditionExpression =

P3, '+', P2;

P2 =

P1

| MultiplicationExpression;

MultiplicationExpression =

P2, '*', P1;

P1 = id;

Now when parsing the text “x + y * z”, only one tree can be generated:

Although it is a bit denser than the original trees, this syntax tree represents the correct semantics of the expression. The incorrect tree from before, which had a multiplication expression “owning” an addition expression, can never be generated with this grammar.

To understand why the incorrect tree is impossible, it is important to understand some general rules used here. First of all, each arithmetic expression has as its arguments other expressions at its precedence level or a higher precedence level. This ensures that the lower precedence operations “own” the higher precedence operations. Second, each “P_” rule represents expressions at that precedence level and higher. So P3 could be anything at P3, P2, or P1. P2 could be anything at P2 or P1. And a P1 can only be something at the P1 level, which is only “id” in this grammar. This is why the root “Expression” symbol represents a P3, because an expression can be any arithmetic operation or just an identifier by itself. It can represent something at any precedence level.

Now it should be a bit clearer why an incorrect syntax tree is impossible to generate. The operands of a MultiplicationExpression can only be “P2” or “P1” level expressions, which are higher in precedence than the AdditionExpression (one of the “P3” expressions). There is no way for a P2 or P1 expression to represent an AdditionExpression non-terminal symbol, so an addition expression can never be one of the operands to a multiplication expression.

Another thing to note here is that “x + y + z” also only has one syntax tree which can be created for it. An AdditionExpression is defined as “P3 + P2”. Since the left operand is “P3” and the right operand is “P2”, the additions must always be parsed as “(x + y) + z”. As we already saw, P2 is higher in precedence than the addition expression, so an AdditionExpression can never be the right operand of another AdditionExpression, which would be required to parse this as “x + (y + z)”. So in addition to disambiguating precedence levels, this grammar also ensures that addition and multiplication are always left-associative. If we wanted to make addition right-associative, we could have defined it with “P2” as the left operand and “P3” and the right operand, like this: “P2 + P3”.

This type of thing can be done for any number of precedence levels by using the same general rules. If the binary expression should be left-associative:

LowerPrecedenceExpression =

HigherPrecedenceExpression

| LowerPrecedenceExpression, op, HigherPrecedenceExpression;

And if the binary expression should be right-associative:

LowerPrecedenceExpression =

HigherPrecedenceExpression

| HigherPrecedenceExpression, op, LowerPrecedenceExpression;

And as shown in the example above, each binary expression can be defined as a separate non-terminal symbol and just referred to by the rule which owns all the operations with the same precedence level. I want to show a larger example with more expressions, but before I do, I just want to mention unary operators. Obviously associativity doesn’t need to be disambiguated with unary operators because there is only one way to associate the operator with the operand. However, you still need to decide whether unary operators can be chained. For example, is “-+-+---5” a valid expression in the grammar or not? If unary operators can be chained, the general rule looks like this:

LowerPrecedenceExpression =

HigherPrecedenceExpression

| op, LowerPrecedenceExpression;

And if they cannot be chained, it looks like this:

LowerPrecedenceExpression =

HigherPrecedenceExpression

| op, HigherPrecedenceExpression;

These examples show a right-associative operator, but they work just the same with left-associative operators except the “op” goes after the sub-expression instead of before it.

Also, before I show the larger example, I should probably come up with some name for this general design pattern for grammar rules, because I might discuss it again in the future. It’s been pretty useful in designing grammars for our built in languages, and not just for arithmetic expressions either. It has even been helpful for things like chained join or union operations in the T-SQL language, which will be available in 13.1. I am not aware of this pattern having a name already, but if anyone thinks I’m wrong, please let me know. Since I’m not that creative, I’ve been referring to this pattern as “operator precedence rules”, which is not to be confused with an operator precedence grammar.

So let’s put it all together and look at a grammar which parses various expressions and allows them to be assigned to a variable. The first thing we need to do is define the precedence levels and associativity of our operators:

  1. Identifier, Constant, (…) – Primary expressions
  2. +, -  – Unary plus, minus (right-associative)
  3. ^ – Exponent (right-associative)
  4. *, / – Multiply, divide (left-associative)
  5. +, - – Binary plus, minus (left-associative)

And now we are ready to write our operator precedence rules:

AssignmentExpression =

id, '=', Expression;

Expression =

P5;

(* P5 represents level 5 expressions or higher, the operands of which are level 5 expressions or higher *)

P5 =

P4

| AddExpression

| SubtractExpression;

AddExpression =

P5, '+', P4;

SubtractExpression =

P5, '-', P4;

(* P4 represents level 4 expressions or higher, the operands of which are level 4 expressions or higher *)

P4 =

P3

| MultiplyExpression

| DivideExpression;

MultiplyExpression =

P4, '*', P3;

DivideExpression =

P4, '/', P3;

(* P3 represents level 3 expressions or higher, the operands of which are level 3 expressions or higher *)

P3 =

P2

| ExponentExpression;

ExponentExpression =

P2, '^', P3;     (* Note the right-associativity here *)

(* P2 represents level 2 expressions or higher, the operands of which are level 2 expressions or higher *)

P2 =

P1

| PlusExpression

| MinusExpression;

PlusExpression =

'+', P2;

MinusExpression =

'-', P2;

(* P1 represents level 1 expressions only, however the parenthesized expression could contain any level expression within the parentheses *)

P1 =

id

| constant

| ParenthesizedExpression;

ParenthesizedExpression =

'(', Expression, ')';

The only downside to this approach is that it produces a pretty dense syntax tree for simple expressions such as “x = y”:

Next time we’ll take a short detour from ambiguities and see how we can still use operator precedence rules but create a syntax tree which is sparser for simple expressions.

By Mike Dour

The information contained herein is provided for reference purposes only.

Copyright © 2013 Infragistics, Inc., All Rights Reserved.


Prototyping Map Zoom in Indigo Studio

0
0

Map Zoom Sample Screenshot

A question came up on our forums regarding how one might prototype map zoom in Indigo Studio. The suggestion was to leverage SVG (which is not currently supported in Indigo, but you can vote for it here if you want it). Chances are good we will add a functional map control at some point in the not too distant future, but in the meantime, I thought it might be useful to share how it can be done.

It uses a lesser known technique in Indigo that relies on the fact that the Container Box will clip its contents. Clipping, for those who may not know, just means hiding part of something based on the boundaries of something else. In our case, if you stick something inside of a Container Box and then either resize the container or the thing inside, the container will hide any parts of its contents outside of its edges. This is handy in quite a few different scenarios, such as cropping images, progressive disclosure, or even animating a transition (such as sliding/pushing something from the clipped region into view).

This also uses a few other advanced techniques in Indigo that I'll elaborate on as we get there. Once you know them, it's easy to use--this sample only took me a couple minutes to put together.

Setup the Basic Screen Layout
1. Add a new Container Box to your screen and resize it to the desired size of your map area.

2. Add a Map from the Stencils in the Toolbox (or using alt+drag/click to add in place). Resize it so it just fits the boundaries of your container--it should snap into place.

3. Add a Button, set its text to + and resize it, align it to the top right. Duplicate it (CMD+D on Mac/CTRL+D on Win) and change the duplicate's text to -. Align it as shown above. Change the foreground and border color to a lighter gray (to indicate disabled).

Add Zoom In
Now you're all set for the fun part!

4. Select the + Button and Add Interaction to it--Change this Screen to New State (you can rename it to "Zoom In" if you want the resultant state to be named "Tapped/Clicked Zoom In" rather than "Tapped/Clicked +"; your choice.

5. Now in the new state, select the map and just drag its bottom right corner to the right/bottom some extent (however much you want it to zoom). Because our stencils are vector based, they scale nicely.

Animate Zoom In
Zoom Map Timeline

6. Now you will notice the RESIZE action was added in the timeline. Just select it and drag the right edge out. This makes the resize animate over however long you pick; I did 1 second. You can click Try Interaction now if you want to test it out and adjust the duration.

Enable and Add Zoom Out
7. Now you want to enable the zoom out, so select the - Button and reset its foreground and border color to make it look enabled. Optionally, you can select both of those actions and drag them out, so it only looks enabled at the end of the transition.

8. Now select the - again and click Add Interaction. Here, you just pick "Go Back" from the drop down at the bottom. Now you can Try Interaction again, and you should be able to zoom in and zoom out. Fun, no?

Adding Another Level of Zoom
Now we could stop here, but in the sample, I added one more level of zoom.

9. Select the + Button. You will see that it has the Taps/Clicks interaction defined.


Zoom Map Zoom In Interaction

What we want to do is edit and override this for this state, so click the pencil edit icon to do that. Next choose "Change What Happens" and then Change this Screen To New State. In this new state, repeat Steps 5-6 from above to zoom in more.

That's it! You now have a working map zooming sample. Here is the sample screen for you to dig into.

Advanced Tip: In the last zoom in state, you may want to remove the Zoom In interaction from the zoom in button. Although it won't have any visible effect if you click again (because you're already zoomed in), the button will still show as highlighted and that could be confusing. Clicking the trashcan icon next to the interaction will effectively disable/remove that interaction for that state (and any after it in your flow).


Bonus: Combine Map Zooming with Other Interactions/States
In the sample above, the only interactions defined are for map zooming; it's super easy and works just right. But what if you wanted to have map zooming work independently of whatever other state you happened to be on in that screen? For that, you use "Shared Interactions" as follows.

First of all, because we used "Go Back" in the sample above, Indigo will always reverse whatever the last change was in the prototype (state change or screen navigation). If you have other interactions defined that means the zoom out might not always reverse the zoom in. So if you are using other interactions, instead of using Go Back, you just need to go to each zoomed in state and override the - (zoom out) Button to Change this Screen To Existing State, and pick the immediately prior state in the flow. This ensures that no matter what, when zoom out is clicked, it will go to that specific state. And because it is immediately prior, we will still reverse the animations for you.

Second, to make it so that you can zoom in and out on the map no matter what else is going on, you need to open the first Zoom In state (Tapped/Clicked Zoom In) and click the Share Interaction on the TRANSITIONS/ANIMATIONS bar. That's it--now no matter what else is going on in the prototype, when the zoom buttons are clicked, it will change the map zoom as expected.

Here's the running example of the map zoom shared/combined with another interaction. See how you can click the Button on the bottom, which adds some text, and the zooming still works right regardless? Here is the sample screen, if you want to get your hands dirty to see better how it is done.

If you're having trouble following this, that's okay. This is some of the more advanced stuff you can do with Indigo Studio interactions. The interactions and states usually "just work" like you expect them to, but they can in some cases get a little tricky, especially when shared interactions get involved. If you want to dig deeper, I recommend our Understanding Screen Interactions and States help topic.

NetAdvantage for Windows Forms Release Notes - March: 12.1, 12.2 Service Releases

0
0

With every release comes a set of release notes that reflects the state of resolved bugs and new additions from the previous release. You’ll find these notes useful to help determine the resolution of existing issues from a past release and as a means of determining where to test your applications when upgrading from one version to the next.

Release notes are available in both PDF and Excel formats. The PDF summarizes the changes to this release along with a listing of each item. The Excel sheet includes each change item and makes it easy for you to sort, filter and otherwise manipulate the data to your liking.

In order to download release notes, use the following links:

WinForms 2012 Volume 2 Service Release (Build 12.2.20122.2052)

PDF - NetAdvantage for WinForms 2012 Volume 2
Excel - NetAdvantage for WinForms 2012 Volume 2

WinForms 2012 Volume 1 Service Release (Build 12.1.20121.2118)

PDF - NetAdvantage for WinForms 2012 Volume 1
Excel - NetAdvantage for WinForms 2012 Volume 1

Microsoft Makes Designing for Internet Explorer a Little Easier

0
0

Many web developers will never forgive Microsoft for Internet Explorer. Due to its almost total lack of respect for standards, version 6 in particular, which is still used to this day by a small minority of (mainly enterprise) users, commands a certain level of disdain. Later versions have improved; however, the damage is hard to reverse. Microsoft estimates that 40% of the top 5000 websites use frameworks (designed to get around issues with non-standard browsers like IE6) that now cause problems in IE10.

To help make testing their browsers a little easier, Microsoft has just launched Modern.ie, a set of tools and resources designed for exactly that purpose. The site includes a page scanner which provides a report of common HTML problems (and possible fixes), a host of best practice advice, and links to a number of virtual machines (see here). Probably the best feature is a free three month subscription to BrowserStack.

The site won't make all of your browser testing troubles go away, but is it nice to see Microsoft trying to make amends. More significantly for some, Microsoft is getting closer to releasing Internet Explorer 10 for Windows 7 (the browser is shipped as standard with Windows 8). Various betas have been in testing for a while, but it is thought that a final release isn't too far off. An IE10 blocker has just been released, allowing enterprise customers to block the release when it arrives. However, many web designers will welcome users upgrading to IE10, in an attempt to get as far as possible from the bad old days of previous versions.

Infragistics Friends Group Presentation: Cross Platform Mobile Game Development with .NET Event Recap

0
0

Infragistics Friends group  with the help of Infragistics Inc. organized a presentation on topic "Cross Platform Mobile Game Development with .NET". Presentation was focused on XNA and MonoGame (implementation of XNA for almost all mobile platforms)


The event was held on Thursday, December 13th  at Infragistics Bulgaria Office, 110B, Simeonovsko Shosse Bul., Sofia, Bulgaria.

Speaker was Christo Tsvetanov - an Infragistics Friend, a veteran, started with punch cards and punched tapes. Now with main interests in 3D applications for mobile devices. In the past he has worked for OBS, Infragistics, Telerik. Now he is an Automation Team Lead @ Global Matrix.

Presentation covers XNA basics, main terminology in 3D, game development for WIndows / Windows Phone / XBox and  introduction to programming with MonoGame.


Pictures from this event are available here.

You could download presentation and all samples from this link.

As always, you can follow us on Twitter @mihailmateev and @Infragistics and stay in touch on Facebook,Google+andLinkedIn!

24 Hours of PASS. Russian Edition Event Recap

0
0

On March 21 was held the second online conference "24 Hours of PASS. Russian Edition". On March 21 was held the second online conference "24 Hours of PASS. Russian Edition". The conference is organized by PASS (The Professional Association for SQL Server) and presents lectures on SQL Server, Windows Azure and BI with the help of the Russian SQL Server community,


Infragistics Inc was presented at the conference in me as a speaker. I presented the lecture "Spatial Data and Windows Azure SQL Database" in Russian. There was demonstrated also demos with Windows Azure WEB Sites, including ASP.Net MVC 4 applications with Ignite UI and Entity Framework 5. This was the first Infragistics  presentation for Russian online conferences. Special thanks to Andrey Korshikov and Denis Reznik for the help and the amazing organization!

I can summarize that it was a great event with noticeable participation of Infragistics.


Live demos (Windows Azure WEB Sites, including ASP.Net MVC 4 applications with Ignite UI and Entity Framework 5) can be seen here.

More information about the conference can be found here. Event schedule is available here.

Follow news from Infragistics for more information about new Infragistics events.

As always, you can follow us on Twitter @mihailmateev and @Infragistics and stay in touch on Facebook,Google+andLinkedIn!

Viewing all 2363 articles
Browse latest View live


Latest Images