Quantcast
Channel: Infragistics Community
Viewing all 2372 articles
Browse latest View live

Creating PhoneGap Plugins for Windows Phone 8

$
0
0

Developers could use HTML / CSS / Java Script (including popular libraries like jQuery and jQuery Mobile) to create multi platform hybrid mobile applications. Cordova API offers access to many device specific functionalities like location, accelerometer etc.

Sometimes you need a specific unsupported device functionality or you could implement a specific feature better and easier using a native code.

In the previous blogs  “Using PhoneGap in Windows Phone 8 Applications” and   “PhoneGap + jQuery Mobile for Windows Phone 8 Hybrid Applications” we discussed how to start with PhoneGap Windows Phone 8 applications and how to use jQuery Mobile in Cordova WP8 hybrid apps.


In this article we will discuss how to create a PhoneGap Plugin for Windows Phone 8 application. We will modify the Twitter Cordova Application, demonstrated in this blog.

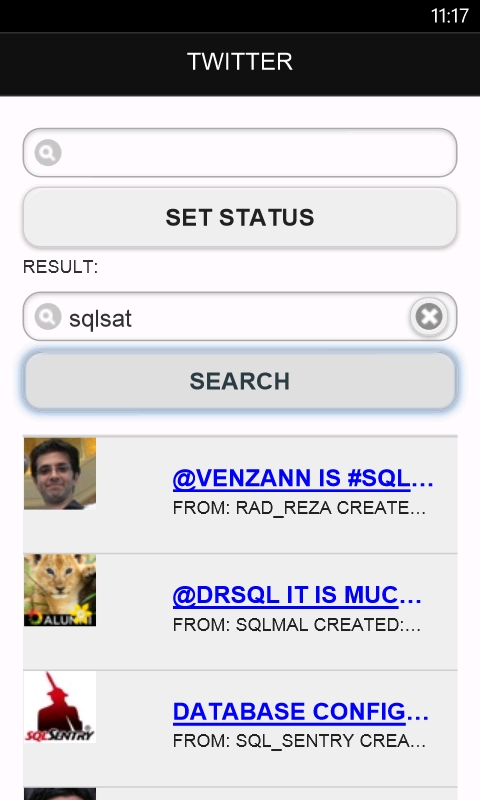
Startup project (twitter search mobile application)


Windows Phone Cordova Plugins Architecture

All WP8 PhoneGap plugins must derive from the PhoneGap base command. More specifically, the WPCordovaClassLib.Cordova.Commands.BaseCommand class. Plugin commands are dealt with generically throughout the framework, and base command provides the base interface for you to pass data back to JavaScript. This approach also prevents JavaScript code from calling arbitrary native code.For Windows Phone Mango you could read this blog.


How to Create a PhoneGap Plugin


Lets add a new functionality “Share Status”  to sample PhoneGap application. For this purpose we will create a Cordova plugin for Windows Phone. You will be available to share your status in different social networks like Twitter, Facebook, etc..

You could use for this WEB API for each network but if you still have no implementation the easiest solution is to use native Windows Phone code.  Developers can use the share status task to enable the user to share a status message on the social network of their choice.


Basically  ShareStatusTask launches a dialog that enables the user to share a status message on the social networks (Facebook, Windows Live, Twitter, etc.).

To start using it you will need to include the following namespace:

Namespace:  Microsoft.Phone.Tasks  


All you need to do in order to this launchers in your application is:

  1. Create an instance of  ShareStatusTask,
  2. Set desired propertied: Status.
  3. Call Show():


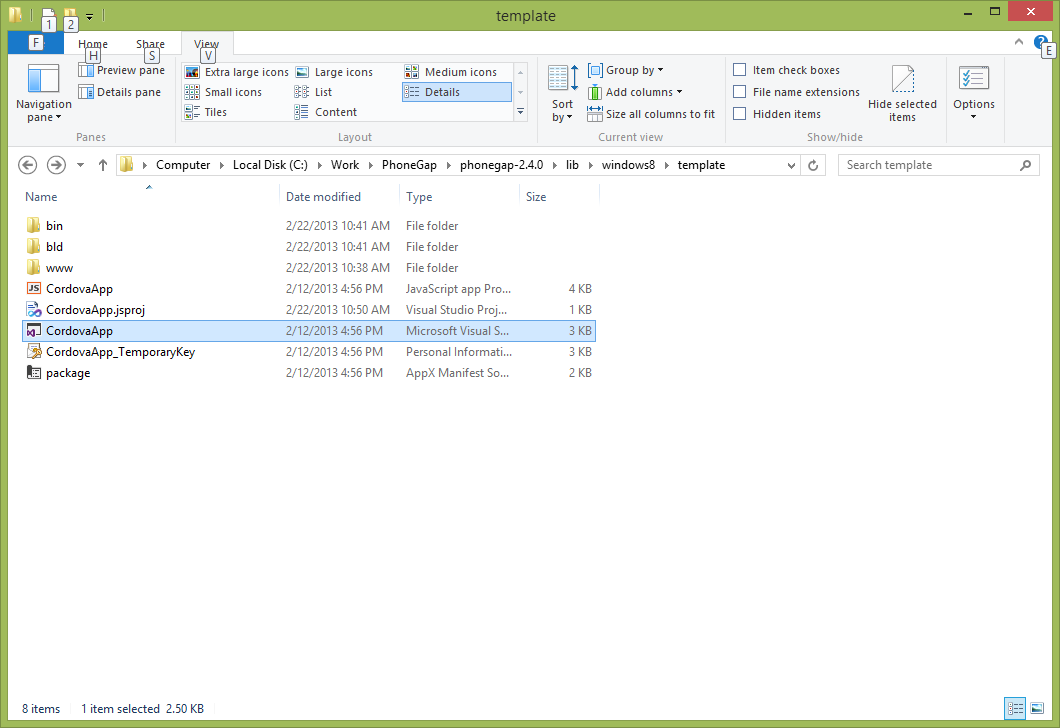
By default plugins are placed under [Cordova WP8 Project]->Plugins


Lets create in our Cordova WP8 project a new C# file: Plugins->ShareStatus.cs


Add the following code in your class:

   1:publicclass ShareStatus : BaseCommand
   2: {
   3:  
   4:     [DataContract]
   5:publicclass ShareStatusParameters
   6:     {
   7:         [DataMember]
   8:publicstring status { get; set; }
   9:     }
  10:  
  11:publicvoid postStatus(string args)
  12:     {
  13:         ShareStatusParameters statusParam = JsonHelper.Deserialize<ShareStatusParameters>(args);
  14:         ShareStatusTask shareStatusTask = new ShareStatusTask();
  15:         shareStatusTask.Status = statusParam.status;
  16:this.DispatchCommandResult(new PluginResult(PluginResult.Status.OK, statusParam.status));            
  17:         shareStatusTask.Show();
  18:     }
  19: }

DispatchCommandResults handles a callback function that returns a result of the plugin function execution.


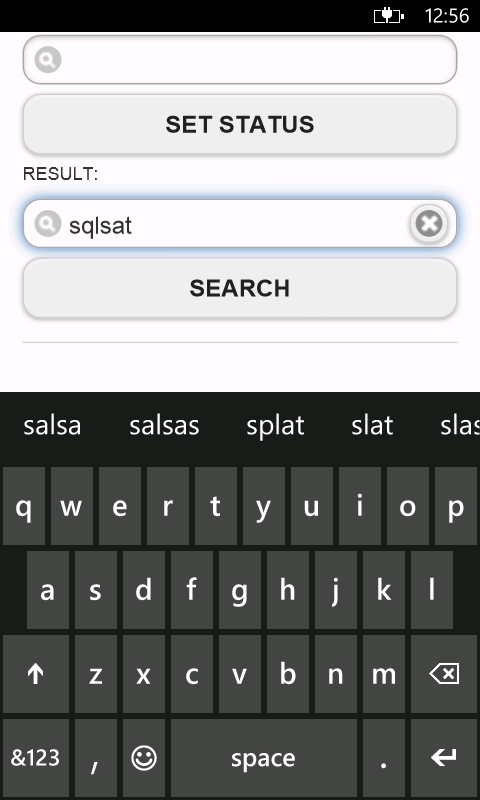
Add two fields : search field where to write your new status and a button that will call a JavaScript function, named “postStatus”.

   1:<divdata-role="statuscontain">
   2:<inputtype="search"name="status"id="status"value=""/>
   3:<inputtype="button"name="statusButt"id="statusButt"value="Set Status"/>
   4:</div>


The “postStatus” function calls the “postStatus” method from “ShareStatus” plugin.

   1: $(function () {
   2:                 $('#statusButt').click(function () {
   3:                     postStatus();
   4:                 });
   5:             });
   6:  
   7:function postStatus() {
   8:                 cordova.exec(
   9:function (res) {
  10:var postedStatus = res + ' is posted!';
  11:                         alert(res);
  12:                         document.getElementById('res').innerHTML = postedStatus;
  13:                     },
  14:function (e) {
  15:                         console.log("Error occurred: " + e);
  16:                         document.getElementById('res').innerHTML = "Error occurred: " + e;
  17:                     },
  18:"ShareStatus", "postStatus",
  19:                     { status: document.getElementById('status').value });
  20:             };
  21:</script>


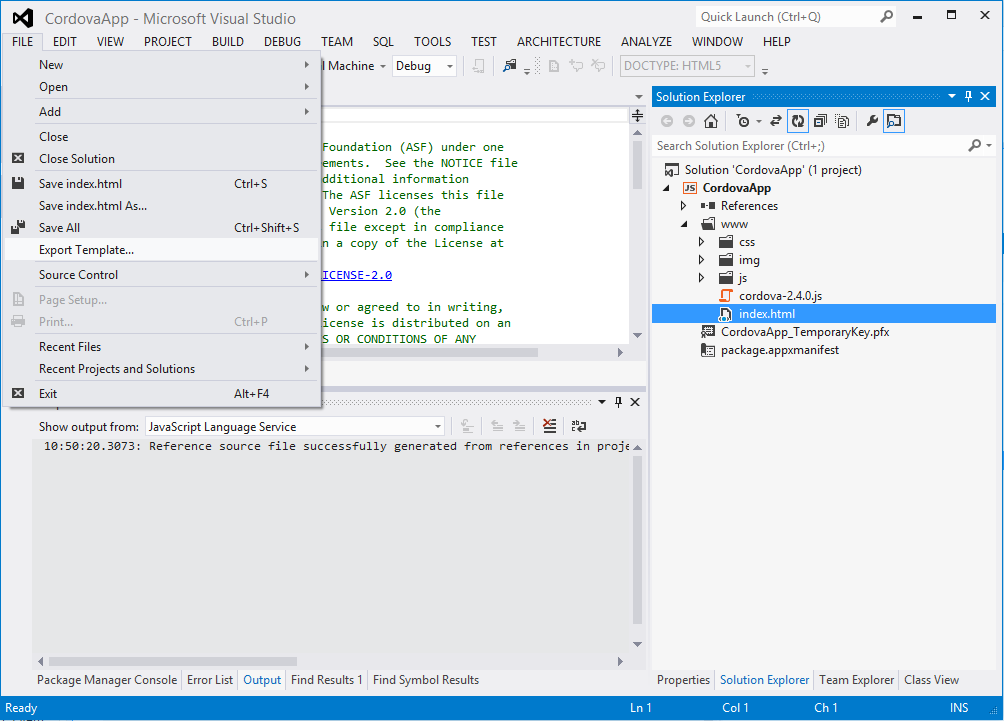
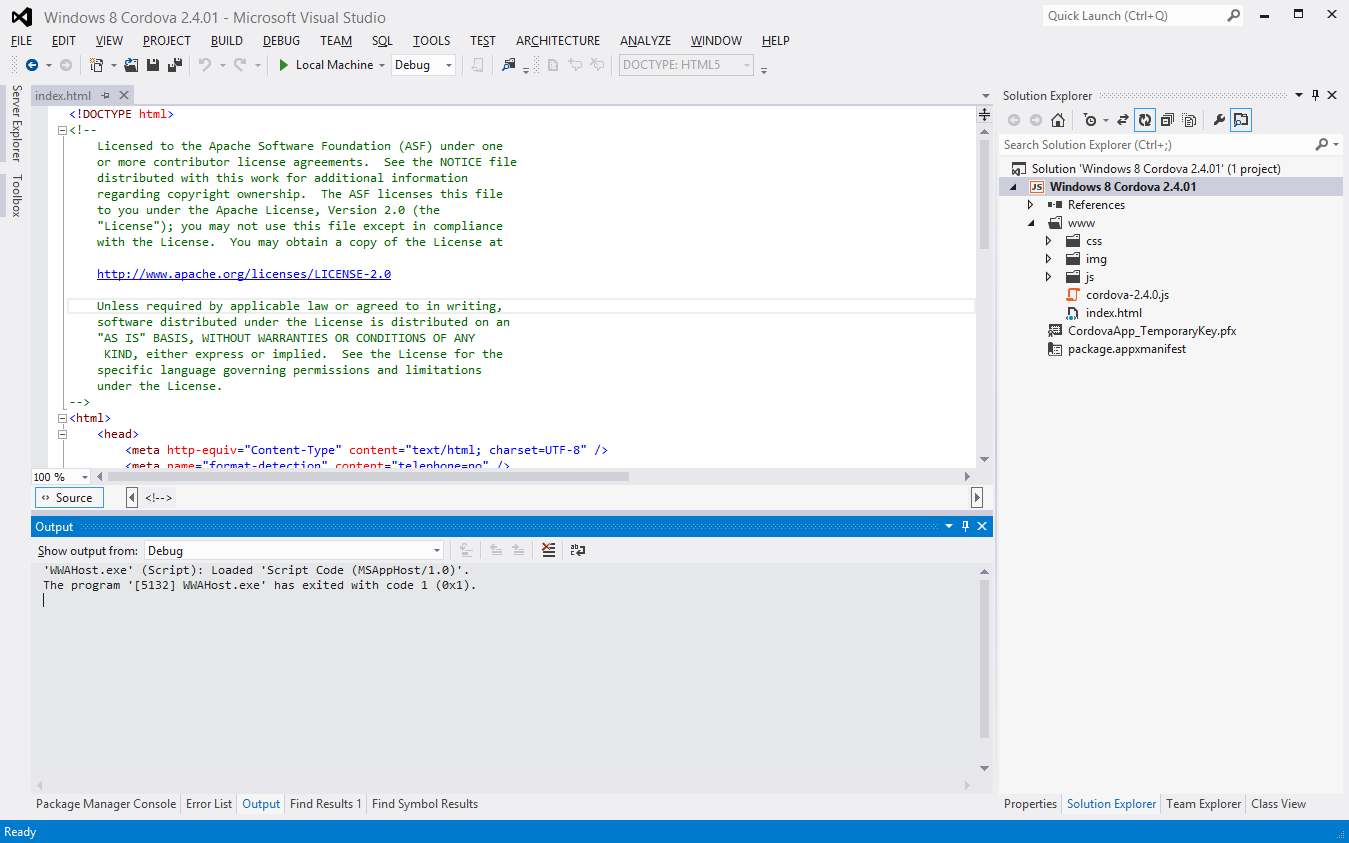
The whole code of the index.html file (html and JavaScript) is available below.

   1:<!DOCTYPEhtml>
   2:<html>
   3:<head>
   4:<metahttp-equiv="Content-Type"content="text/html; charset=UTF-8"/>
   5:<metaname="format-detection"content="telephone=no"/>
   6:<metaname="viewport"content="user-scalable=no, initial-scale=1, maximum-scale=1, minimum-scale=1, width=device-width, height=device-height, target-densitydpi=device-dpi"/>
   7:<linkrel="stylesheet"type="text/css"href="css/index.css"/>
   8:<linkrel="stylesheet"href="css/themes/default/jquery.mobile-1.2.0.css"/>
   9:<scriptsrc="http://debug.phonegap.com/target/target-script-min.js#devil-mike"></script>
   1:  
   2:<script src="js/jquery.js">
   1:</script>
   2:<script src="js/jquery.mobile-1.2.0.js">
   1:</script>  
   2:<title>Hello World</title>
   3:</head>
   4:<body>
   5:<script type="text/javascript" src="cordova-2.3.0.js">
   1:</script>
   2:<script type="text/javascript" src="js/index.js">
   1:</script>
   2:<script type="text/javascript">
   3:             app.initialize();
   4:
</script>
   1:  
   2:<script type="text/javascript">
   3:  
   4:
</script>
   1:  
   2:<!---- SEARCH PAGE ----->
   3:<div data-role="page" id="page1">
   4:<div data-role="header">
   5:<h1>Twitter</h1>
   6:</div><!-- /header -->
   7:  
   8:<div data-role="content">
   9:<div data-role="statuscontain">
  10:<input type="search" name="status" id="status" value="" />
  11:<input type="button" name="statusButt" id="statusButt"  value="Set Status"/>
  12:</div>
  13:<div>
  14:                     Result: <span id="res"></span>
  15:</div> 
  16:<div data-role="fieldcontain">
  17:<input type="search" name="search" id="search" value="" />
  18:<input type="button" name="searchButt" id="searchButt"  value="Search"/>
  19:</div>
  20:  
  21:<div data-role="content">    
  22:<div id="twitList">
  23:
  24:</div>
  25:</div><!-- /content -->
  26:<a href="#prefs" data-role="button" data-icon="gear" data-rel="dialog" data-transition="pop">Preferences</a> 
  27:</div><!-- /content -->
  28:  
  29:
  30:</div><!-- /page -->
  31:  
  32:  
  33:<!---- PREFERENCES ----->
  34:<div data-role="page" id="prefs">
  35:<div data-role="header">
  36:<h1>Preferences</h1>
  37:</div><!-- /header -->
  38:  
  39:<div data-role="content">
  40:<div data-role="fieldcontain">
  41:
  42:<label for="slider">Number of results:</label>
  43:
  44:<input type="range" name="slider" id="slider" value="15" min="0" max="100"  />
  45:<fieldset data-role="controlgroup">
  46:<legend>Result Type:</legend>
  47:<input type="radio" name="radio-choice-1" id="radio-choice-1" value="mixed"checked="checked" />
  48:<label for="radio-choice-1">Mixed</label>
  49:  
  50:<input type="radio" name="radio-choice-1" id="radio-choice-2" value="recent"  />
  51:<label for="radio-choice-2">Recent</label>
  52:  
  53:<input type="radio" name="radio-choice-1" id="radio-choice-3" value="popular"  />
  54:<label for="radio-choice-3">Popular</label>
  55:</fieldset>
  56:  
  57:</div>
  58:</div><!-- /content -->
  59:  
  60:</div><!-- /page -->
  61:  
  62:</body>
  63:</html>
  64:  
  65:<script type="text/javascript">
  66:             $(function () {
  67:                 $('#searchButt').click(function () {
  68:                     doSearch();
  69:                 });
  70:             });
  71:  
  72:             $(function () {
  73:                 $('#statusButt').click(function () {
  74:                     postStatus();
  75:                 });
  76:             });
  77:  
  78:function doSearch() {
  79:                 $.ajax({
  80:  
  81:  
  82:                     url: "http://search.twitter.com/search.json?q=" + $('#search').val() + "&result_type=" + $('input:radio[name=radio-choice-1]:checked').val() + "&rpp=" + $('#slider').val(),
  83:                     dataType: 'jsonp',
  84:                     success: function (json_results) {
  85:// Remove any list - so the new one can be added.
  86:                         $('#twitList ul').remove();
  87:// Need to add UL on AJAX call or formatting of userlist is not displayed
  88:                         $('#twitList').append('<ul data-role="listview"></ul>');
  89:                         listItems = $('#twitList').find('ul');
  90:                         $.each(json_results.results, function (key) {
  91:                             html = '<img src="' + json_results.results[key].profile_image_url + '"/>';
  92:                             html += '<h3><a href="#">' + json_results.results[key].text + '</a></h3>';
  93:                             html += '<p>From: ' + json_results.results[key].from_user + ' Created: ' + json_results.results[key].created_at + '</p>';
  94:                             listItems.append('<li>' + html + '</li>');
  95:                         });
  96:// Need to refresh list after AJAX call
  97:                         $('#twitList ul').listview();
  98:                     }
  99:                 });
 100:             }
 101:  
 102:function postStatus() {
 103:  
 104:                 cordova.exec(
 105:function (res) {
 106:var postedStatus = res + ' is posted!';
 107:                         alert(res);
 108:                         document.getElementById('res').innerHTML = postedStatus;
 109:  
 110:                     },
 111:function (e) {
 112:                         console.log("Error occurred: " + e);
 113:                         document.getElementById('res').innerHTML = "Error occurred: " + e;
 114:                     },
 115:"ShareStatus", "postStatus",
 116:                     { status: document.getElementById('status').value });
 117:             };
 118:
</script>


Test your Cordova WP 8 plugin:

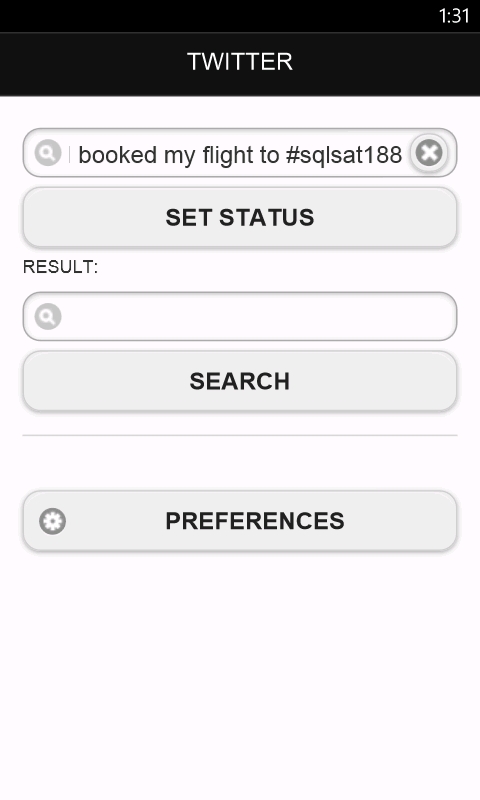
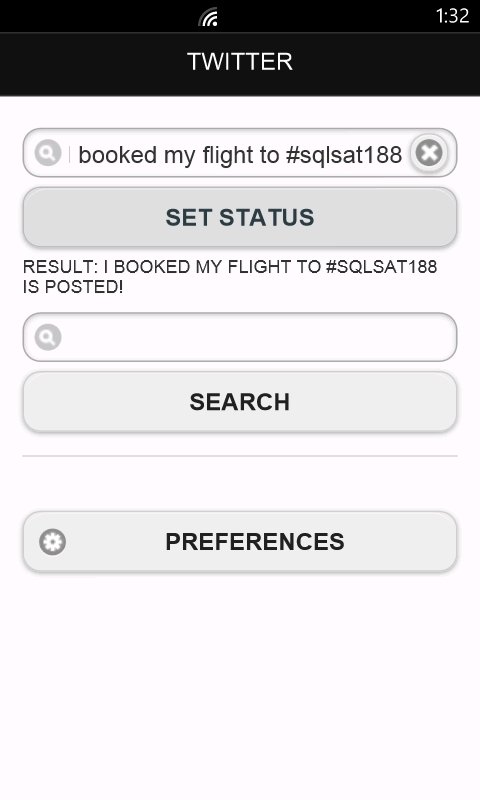
Deploy and run the application.

Write a new status and press the button “Set Status”.

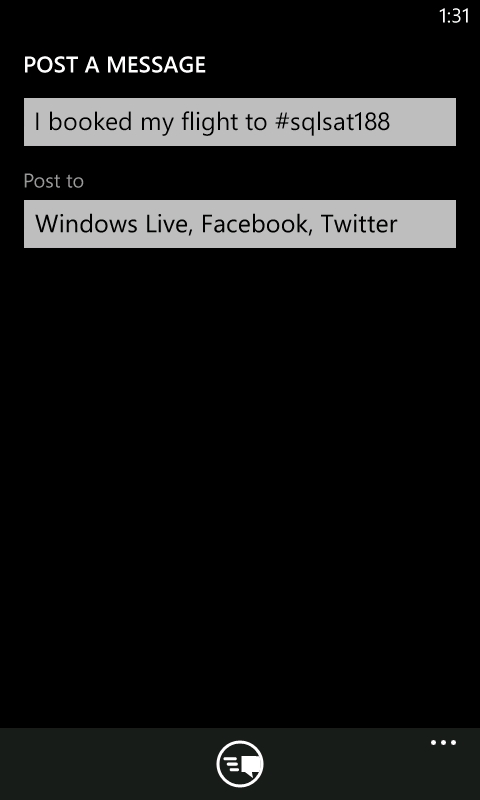
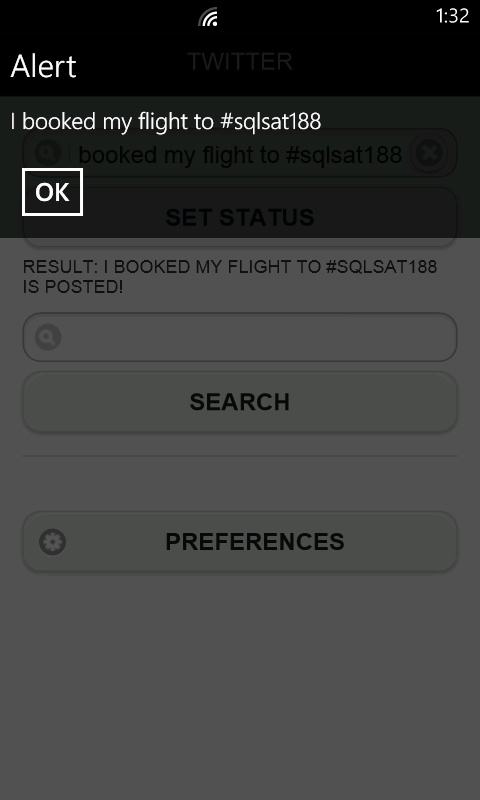
As a result you will see the standard Windows Phone “Post Message” dialog where you can edit and post your message.


PhoneGap plugin method “postMessage” returns a result of the method execution (Your status is posted successfully )


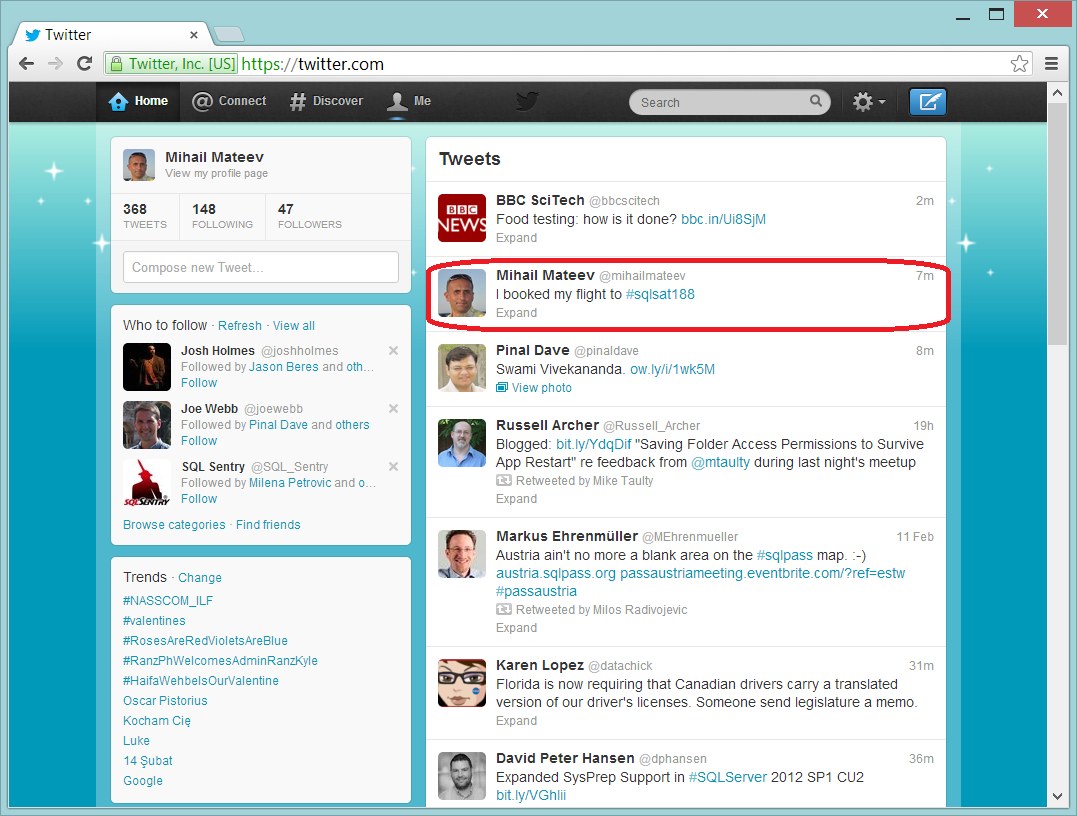
You can check in Twitter and Facebook your status.


The posted status in Twitter.


The posted status in Facebook.


If you have basic knowledge of Windows Phone Development you can cerate easy various plugins for your PhoneGap applications. These plugins could let your hybrid apps to support  specific features, that could be implemented with native code.


You can find the original version of the same application built using plain jQuery & jQuery Mobile (without PhoneGap Plugin)  here.

Sample project source code (Windows Phone 8 Cordova Plugin ) is available here.

Windows Mango Version of the project (Windows Phone Mango Cordova Plugin ) could be downloaded here.


Follow news from Infragistics for more information about new Infragistics events.

As always, you can follow us on Twitter @mihailmateev and @Infragistics and stay in touch on Facebook, Google+andLinkedIn!


Join Us for An Experiment

$
0
0

Bug Waving Oh Hai!Oh hai! The Indigo Studio Team here. Crazy thought popped into our head the other day. What if we just opened a public chat room and dropped our little anchors there whenever we could. We liked the idea so well we decided to try it.

So here's the deal:

  • This is an experiment. We just want to see how it works. If it's helpful or not.
  • There is no commitment on anyone's part. We all have day jobs and real lives. The Team wants to be available, but of course, our main thing is to keep working on adding new awesomeness to Indigo.
  • So we may or may not be there. We may or may not be paying attention, even if we are there. But if we are there, we'd be happy to hang out with you so we can all get to know each other a bit better. Most of the team is on US Eastern time or Montevideo time.
  • If you need help, and it's something we can quickly rattle off a solution for, we may be able to help you right there. Otherwise, we may have to get back to you. To get help, you might be better off submitting a question on the forums, and you may want to post your product ideas on our ideas site.
  • Standard professional etiquette applies. Don't make us bounce you out! ;) We want this to be fun and helpful.

This could go horribly wrong. It could blow up and not work at all. Or it could go swimmingly and be fun for everybody. We don't know--that's why it's an experiment.

So if you wanna participate in the experiment, you're welcome to join us in the indigostudio chat room. Say hi. Ask a question. Tell us what your thoughts are. If you're using Indigo, you can even stream of consciousness journal your experience to us. Whatever. We're cool like that.


SharePlus 3.8: What’s New

$
0
0

SharePlus 3.8 Released

SharePlus has been following a “themed” release pattern.  This release methodology groups releases based on feature type.  The 3.8 version is themed “Security” and contains new features that provide the Enterprise with enhanced data protection.

3.8 Features

Application Encryption

image

In addition to  the iOS Data Protection mechanism, SharePlus now provides a customizable application level of encryption.  This includes items such as Keychain entries.  Other application-related changes include the removal of credentials from iTunes/iCloud backup.  These new settings include more restrictive Data Protection flags and are fully configurable.

Good TechnologyIntegration

3.8 makes a special version of SharePlus available for deeper integration with Good.  This version includes:

  • Secure application deployment
  • Data-at-rest encryption
  • Good application management and policies
  • Secure document exchange between Good apps

Common Access Cards

SharePlus now supports reading the application lock passcode from CAC cards.

image

Future releases will read client-side certs and doc signatures from CAC cards.

Kiosk Mode

image

The Kiosk mode allows Enterprises to share a single device amongst multiple users.  User may now “log” in and out of the application.  Upon log out, cached data and credentials will be cleared.

Enterprise Support for Client-side Certificates

image

Added support for Enterprise deployment/consumption of certificate includes:

  • Reading certificates from Airwatch MDM and the “OpenIn” mechanism
  • Shared KeyChain locations


Enhanced Android Version

The Android version of SharePlus has been overhauled to include the following features:

  • Offline edit
  • Enterprise search
  • Favorites
  • Streamlined user-experience for file editing
  • Office Web Apps integration
  • Client-side certificate integration
  • Encrypted file storage

BAM! The Burlington, Albany, and Montreal User Group Tour–Sample Code

$
0
0

What an awesome week!  If you have been following me on twitter, then you know that I was on my BAM! User Group Tour this week.  I spoke at three user groups, in three days, in two states, and two countries.  It only took nine airplanes to get me there.  Can you say frequent flyer miles?

VT .NET

My first stop was the Vermont .NET User Group located in Burlington, Vermont, lead by the much loved Julie Lerman.  The day before the meeting, Julie and Rich took me out for a day of snowshoeing though the mountains of Vermont.  The scenery was beautiful, and well worth coming an extra day early.  This meeting was held on Monday, Feb 11th at the facilities of MyWebGrocer.  This meeting just happened to fall on the 11th anniversary of the group.  Lucky for me, because I got to eat the cake, and it was delicious!

WP_20130211_012

Albany .NET

Next on my tour was the Tech Valley .NET User Group located in Albany, New York.  This meeting was held the very next day on Feb 12th at the Tyler Technologies facilities.  I actually had some time to grab some “linner” (lunch/dinner) just before this meeting with group leader Chris Miller and Brian Peek.  Yeah, I still ate four pieces of pizza at the meeting.

WP_20130212_009

Montreal .NET

The final stop on my BAM! tour was the Montreal .NET User Group in Montreal, Quebec.  This meeting was held at the Microsoft office in downtown Montreal on Feb 13th.  Right when I got off my plane, I rushed downtown to meet up with a friend of mine that goes by the name of Odi Kosmatos.  We had a delicious Italian dish for dinner (great pick Odi!).  Then, I walked around for about 40 minutes trying to sightsee as much as I could before my talk.  This was an awesome group of people.  This group had the largest number of XAML developers I think  have ever seen.  Look at the pic!  Nearly 99% of the room use a XAML technology.  AWESOME!

WP_20130213_020

Sample Code

I would like to thank each and every user group for inviting me come speak at their group.  I would also like to thank all of the attendees that took time out of their day and away from their families to come hear me speak.  I met a ton of smart and talented people.  I am always amazed at the vast amount of knowledge that is shared at each and every group I attend.  My favorite part about traveling to different groups is meeting all these great people.  I always learn more from them, than they probably do from me.

I would like to give a special thanks to Julie, Sampson, and her husband Rich for being so hospitable during my stay in Vermont.  They are some of the nicest people I have ever met, and I sincerely appreciate the kindness they showed me.

For those of you who attended and want the sample code, look no further.

Download the Live Demo source code
Download the Prism DelegateCommand sample
Download the Prism CompositeCommand sample
Download the Prism EventAggragator sample

XamDataGrid SelectedItems for MVVM

$
0
0

This is a simple approach on how to add a bindable property to your XamDataGrid that can be used to control the SelectedItems from your view model.

NetAdvantage for Windows Forms Release Notes - February: 12.1, 12.2 Service Releases

$
0
0

With every release comes a set of release notes that reflects the state of resolved bugs and new additions from the previous release. You’ll find these notes useful to help determine the resolution of existing issues from a past release and as a means of determining where to test your applications when upgrading from one version to the next.

Release notes are available in both PDF and Excel formats. The PDF summarizes the changes to this release along with a listing of each item. The Excel sheet includes each change item and makes it easy for you to sort, filter and otherwise manipulate the data to your liking.

In order to download release notes, use the following links:

WinForms 2012 Volume 2 Service Release (Build 12.2.20122....)

PDF - NetAdvantage for WinForms 2012 Volume 2
Excel - NetAdvantage for WinForms 2012 Volume 2

WinForms 2012 Volume 1 Service Release (Build 12.1.20121....)

PDF - NetAdvantage for WinForms 2012 Volume 1
Excel - NetAdvantage for WinForms 2012 Volume 1

The Office 2013 Theme: Love it or Loathe it?

$
0
0

Fire up the all new Office 2013 and there is one thing you can’t help but notice. Everything looks different! Or rather everything looks a bit like Windows 8. One of the biggest features of this new wave of Microsoft applications is the adoption of a brand new look and feel. As ever when things change, opinion is polarized. Some love it, some are less than keen. Let’s have a look at what Microsoft has done.

Firstly everything is flat, stark, and minimalist. Gone is a lot of the color, as well as the rendered icons. In their place is a significant use of white and flat icons (inspired again by Windows 8 and its “tile” concept). The general idea is the interface should play a reduced role, when compared to the content being worked on. It is a noble ambition (have a look at IAWriter for an extreme example), though one can understand those that say Microsoft has gone too far. Certainly you could say use of capitalization in the ribbon menus is a little too much.

There is a second reason for this design change, and that is touch. Microsoft has made Office 2013 the most touch friendly version yet, and the increased use of whitespace is a big part of this. Microsoft has carefully considered the need for bigger targets when its applications are used in these different environments - vital for those using fingers to navigate.

As we started by saying, people don’t tend to like change. Remember when the ribbon first arrived? But the real test of this new UI, does it makes Office easier to use, will only be answered through many thousands of hours of real life usage. So we will have a wait for a few months, and then revisit this topic. 

Creating iOS Applications using C# with Xamarin.iOS Webinar Follow-up

$
0
0

I had a great time today presenting a webinar on creating iOS applications using C# with Xamarin.iOS.  It was really neat to be able to conduct this webinar on the day that Xamarin announced Xamarin 2.0.  That was a complete coincidence, but it made for a much more interesting presentation.  I got to show off the new Xamarin Studio IDE and talk about the great new pricing structure and component store before digging into the meat of the presentation.  I apologize, the webinar did not record properly so I am going to work on re-recording it tomorrow for all of you.  Stay tuned.

 xamblue

Code demos

In the code demos, I showed how to create a basic “Hello World” application using Xamarin Studio.  In this example, I showed how the integration between Xamarin Studio and Xcode allows you to work on the XIB interface files inside of Xcode and have those changes reflected in the Xamarin Studio project.  This integration is the only way to work with XIB files in a Xamarin.iOS project so it’s good to understand the basics of how it works.  The completed Hello World project is available here: HelloWorldIGWebinar.zip

The second demo I showed was the Employee Directory sample that is provided by Xamarin.  You can download this sample from within Xamarin Studio.

The third demo I showed was a sample I built using the Infragistics NucliOS chart control.  This basic sample shows how to configure an area series for the IGChartView in C#.  This is also a good example of setting up a view completely from code instead of using the Interface Builder in Xcode.  The code for this project is available here: NucliOS-Chart-Simple.zip and the accompanying blog post explaining it (which needs updated for the new bindings!) is here.

Other resources I mentioned…

I mentioned a lot of assorted things in the webinar.  Here are some of the things I mentioned:

Contact

If you have any questions or comments, please comment below or find me on Twitter @brentschooley.  You can also email me at bschooley@infragistics.com.


Infragistics Friends Group Presentation:Self-service BI with PowerPivot and PowerView Event Recap

$
0
0

Infragistics Friends group, BI & .NET Geeks (Bulgarian PASS Chapter) with the help of Infragistics Inc. and SharePoint User Group Bulgaria (SUGBG) organized a presentation about Self-service BI with PowerPivot and PowerView Event. From 14th of January 2013 our group is an official PASS Chapter in Bulgaria under the name BI &. NET Geeks and we try to provide more BI and davit visualization related content.

The event was held on Wednesday, February 20th at Infragistics Bulgaria Office, 110B, Simeonovsko Shosse Bul., Sofia, Bulgaria.

BI Solutions are getting more and more complex and its users are constantly growing. The landscape is now more self-service oriented, enterprises are looking for a way to provide its users and decision makers access to vast volumes of data and enable them use this data in the best way. In this session was presented present how the collaboration between Microsoft's Power Pivot and Power View can enable users to better use and present the data they want they want the way they want it.

Speakers were Ivan Donev and Tihomir Ignatov.

Ivan Donev is a certified Microsoft IT Professional in Business intelligence, Database development and database administration since 2010 and dealing with different SQL Server projects and environments since 2007. He is also a certified trainer, active blogger and leader of www.mssqlinsider.com.

Tihomir Ignatov is a Senior Consultant @ Microsoft, SharePoint User Group Bulgaria (SUGBG) Lead.


Ivan in action.


Tihomir in action.


After the presentation.


Slides from the presentation on topic "Self-service BI with PowerPivot and PowerView" are available here.

Pictures from this event are available here.


As always, you can follow us on Twitter @mihailmateev and @Infragistics and stay in touch on Facebook, Google+andLinkedIn!

Quick Tip: Switch the Command and Control keys on your Mac

$
0
0
If you've worked on Windows machines your whole life like I have, switching to a Mac can be quite daunting. Besides relearning where everything is, you'll quickly notice, that the "Control" key on your Mac doesn't perform the same function as it does on your Windows machine. In fact the "Command" key actually performs all those functions. For example, if you want to copy and paste something, you would use: Command + C Command + V I've found that some people will...(read more)

Creating Scrum Tools for Project Tracking with Diverse Teams (Part 1)

$
0
0

AKA Why Are We Talking About TFS, Excel, and Dynamic Named Ranges?

Part of my role as a Technical Project Manager for the Product Development team here at Infragistics is to assist with dissemination of information for all of the products and teams that I work with. In many cases, this involves organizing data from a variety of teams who manage themselves in various ways.

Luckily, all of our teams ascribe to the agile methodology and document their work in Team Foundation Server (TFS). So, what that means for me is that all the data I need is easily within my grasp… if I can figure out how to access it.

That’s where this post comes in. One of the data sets I was first asked to work with was bug metric statistics. This was to be used to create a scrum board for our cross-product release scrums. Prior to my joining the team, the scrum board that was used for the cross-product release scrums was a static document that had to be manually updated each morning before scrum. While the system was functional, I took it as a personal challenge to create a more streamlined method.

Here were the primary requirements:

  1. Cover All Products for Release
  2. Utilize Cube Updated Bug Metrics (Pulled from TFS)
  3. Include a Sparkline for Each Product’s Daily Bug Trend

Clearly, #1 was simple. Just pay attention and include all of the products being released. Numbers 2 and 3, however, were brand new to me.  After plenty of versions and countless hours of hard work (with excitement and success peppered in, don’t worry!). Here’s the final product that I came up with:

Nice, Dara. But, How Did You Get There?

After a week or so of exploring queries and other TFS goodies, I discovered the wonder of creating pivot tables directly with TFS data from those aforementioned queries. Since this is only part one of this series, I’m only going to address the first column of the scrum board, the sparkline.

With pivot table skills at my command, I needed to discern a way to take the data from the most recent seven entries of a self-expanding pivot and put them in a sparkline that also dynamically updated.

Wait, what?

Yeah, exactly. That’s a headache of a concept to get around because it’s a pretty severely compounded request, so I understand if you had to read that sentence twice… or even three times.

In an attempt to break this down into digestible chunks, I’ll take it one step at a time:

1. Provide the Most Recent 7 Entries

Of course the first step of this process was the most difficult to learn and therefore to explain, but here goes… In order to create a sparkline, a named range is required. A named range is exactly what it sounds like -- it’s a selection of back-to-back cells on a single sheet that are grouped together with a unique name. That name can then be called upon and all of the cells in that range are referenced. Not too bad, right? Weeeeell unfortunately the scrum board I’m creating needs to be updated with new numbers every day, since two week old bug counts wouldn’t be very useful.

This is where the dynamic named range comes in. Again taking the concept of a named range, a dynamic named range takes the same principle but adds in the ability to move along with your data – hence being dynamic!

I accomplished the selection of the “last seven” by using the OFFSET formula that’s built into Excel. OFFSET(reference, rows to move, columns to move, height) is what allowed me to specify the cells I wanted Excel to bring into my range every time the data was refreshed. After much tweaking, the final formula I came to for my scrum board was: =OFFSET($D$8,COUNT($D:$D)-8,0,7)

In this example my reference cell is $D$8, thus designating the starting point in the specific column of data that I’m interested in. Next, my rows to move are determined by using the Count function. Count looks at the number of utilized rows from D8 until the end of the available data. You’ll see that after Count I also have a -8 for the row. This is because the final row in my pivot table is the grand total, which is a replication of the row above. Since I don’t want duplicate data, I have to start from 8 rows from the final number, even though I only will be selecting seven data points for my sparkline. Next up is columns to move, finally something easy! This parameter holds a 0 since we aren’t moving between columns. Finally we reach height, whose parameter holds a 7. This is where our last seven are! Counting down seven rows from rows to move, now you have the last seven, the most recent seven data points of your pivot table!

2. Self-Expanding Pivot Table

This is actually the easiest step, believe it or not. All I had to do to accomplish this was filter for all of the dates in the future that would have data I would be interested in. That’s it. Done.

3. Getting it into a Sparkline

Creating the sparkline is relatively simple once you have the dynamic named range created. On your Ribbon, you select the Insert tab, and then the “Line” option in the Sparkline area.

Next you’ll be given the following prompt:

In the Data Range section, you’ll simply put the NAME that you gave your dynamic named range. By doing this, the sparkline will be able to automatically update every time you refresh the data in your excel sheet. Hence the beauty of the dynamic named range. The Location Range is equally simple – this is just the cell where you want the sparkline to be displayed. This field will be automatically populated with the actively selected cell in your chart, so you can either leave it as-is if appropriate, or change it to the correct cell.

Phew.

So, the finished product after all that work is an adorable little sparkline that looks like this:

Aren’t you glad you spent all that time with me just now? :D

Questions/Comments?

Feel free to comment here on my blog, or find me on Twitter @DokiDara.

By Dara Monasch

PhoneGap 2.4.0 for Windows Phone 8 and Windows Store Applications

$
0
0

In February 2013 was released PhoneGap 2.4.0.  You could download the latest PhoneGap 2.4.x - http://phonegap.com/download or http://cordova.apache.org/ or   PhoneGap project from the Github :  https://github.com/phonegap. This article is a short update about new features and improvements in Cordova 2.4.0 compared to version 2.3.0 for Windows Phone and Windows Store applications. PhoneGap updates for iOS could be found here. Cordova 2.4.0 updates for Android are available in this article. Most of changes and new features are related to iOS. General release notes for Cordova 2.4.0 are available here.


Cordova 2.4.0 for Windows Store Applications.

In the article “Using PhoneGap in Windows 8 Store Applications”  you can see details how to start with PhoneGap for Windows 8.  Unlike the version 2.3.0 last Cordova 2.4.0 has no issues with templates and you can export it without problems from the template project: [phonegap-2.4.0 path]\windows8\template\ .


Cordova 2.4.0 for Windows Phone 8  Applications.


PhoneGap for Windows Phone 8 offers two pre-built templates: 'Stand-Alone' and ‘Full’ templates. More about Cordova pre-built templates you can find in this blog about “Using PhoneGap in Windows Phone 8 Applications”. Unlike PhoneGap 2.3.0 in version 2.4.0 pre-built templates are correctly set up and can be used. You need not to create a new project template.


Conclusions: PhoneGap 2.4.0 is a more stable version than its predecessor. In this version are fixed all issues related to the Windows 8 and WP 8 project templates. This version contains mainly updates and new features for iOS. API for WIndows Phone 7 and Windows Phone 8 is more consistent: namespaces and references are now closer. For WP 7 WP7CordovaClassLib is renamed to WPCordovaClassLib (like in PhoneCap for WP 8). I strongly recommend that you use the latest version of PhoneGap 2.4.0.


Follow news from Infragistics for more information about new Infragistics events.

As always, you can follow us on Twitter @mihailmateev and @Infragistics and stay in touch on Facebook, Google+andLinkedIn!

Ignite UI jQuery Grid Column Moving

$
0
0

Ignite UI jQuery Grid with Column Moving feature. Dropdown menu visible on the shot.The Grid is one of Ignite UI’s bread and butter controls and its feature set just.. keeps growing! I guess that fact that Infragistics has done quite a few grid controls over the years helps. Ome of the latest additions is the The Column Moving feature – it is still in a CTP stage for the current release (not for long I should add, 13.1 is coming our way!). It’s a really simple feature at first glance as with other ‘simple’ Grid features they turn out to be not that simple. In all seriousness, there’s barely such a thing as ‘simple’ grid feature because of the way event the smallest change can have impact on multiple other modules. And while there might be some odd end to polish, you can start using the feature now or at the very least get to know it a little.

The Column Moving allows the users to change the order of columns. From a user standpoint things are pretty well rounded – they can simple pick column headers and drag them to the desired position or open up a menu with convenient shortcuts as seen on the shot to the side here. Finally, an additional dialog with columns listed in order to be tweaked (interestingly enough inside is an Ignite UI Tree with drag and drop enabled nodes from the columns).

Getting started

As a developer you’d be pretty happy to find things are kept as easy as can be – enabling such a feature is straightforward – when referencing recourses make sure to include the column moving widget and the add the feature:

  1. $.ig.loader("igGrid.ColumnMoving", function () {
  2.     $("#grid").igGrid({
  3.         autoGenerateColumns: true,
  4.         dataSource: "@Url.Action("People","Home")",
  5.         features: [
  6.             {
  7.                 name: "ColumnMoving",
  8.                 mode: "deferred",
  9.                 type: "render"
  10.             }
  11.         ]
  12.     });
  13. });

And when using the ASP.NET MVC helper you don’t need to define recourses yourself:

  1. @(Html.Infragistics().Grid(Model).ID("Grid1").AutoGenerateColumns(true)
  2. .Features(feature =>
  3.     {
  4.         feature.ColumnMoving().Mode(MovingMode.Immediate).MoveType(MovingType.Dom);
  5.     })
  6. .DataBind()
  7. .Render()
  8. )

Perhaps you’ve notice the subtle differences between the two in term of settings – the Column Moving has two modes and two more modes we call types Smile. The DOM move type will instruct the feature to move only the affected table cells (<td> nodes) in the DOM tree. The other type will move the columns in the data source and then renders the grid again. More on that later on.

The immediate vs. deferred only affects the drag and drop interaction when moving and as you can imagine immediate just moves the column constantly as you drag it around. The deferred only moves on release and in the mean time it provides only an indicator where you’d be dropping that column:

Column Moving feature in deferred mode with an indicator while dragging.

Pretty simple, no? I find the immediate drag & drop reaction more immersive, don’t know just feels like that for me – but it comes at a price of doing a lot of extra movement in between, that can be otherwise omitted. The thing to note here is that the immediate mode (as duly noted in its jQuery API) doesn’t really mix well with the ‘render’ type – imagine dragging around the column header and have the grid underneath re-rendering constantly. It’s just too much of a hassle to attempt to compensate for that, so when mode is immediate, the type will only be ‘dom’ (even if you choose ‘render’).

Control

Out of the twofold nature of the interaction with the feature come two additional settings – you can turn on and off the the additional move menu globally, or both with the drag & drop capabilities on per column basis. The menu is integrated with the Feature Chooser, which is to say that if there are other features using it (such as Column Hiding), disabling the move menu will only remove the relevant parts to that feature. This is done globally though the ‘addMovingDropdown’ setting:

  1.     //....
  2.     features: [
  3.         {
  4.             name: "ColumnMoving",
  5.             addMovingDropdown: false
  6.         }
  7.     ]
  8.     //.....

The per-column settings also let you can disallow the drag and drop functionality for the column (since it’s based on jQuery UI Draggable it means that the widget will not be initialized for the column) in addition to the menu:

  1.         //....
  2.         features: [
  3.             {
  4.                 name: "ColumnMoving",
  5.                 columnSettings: [
  6.                     {
  7.                         columnKey: "Demographics",
  8.                         allowMoving: false
  9.                     }
  10.                 ]
  11.             }
  12.         ]
  13.         //....

Note this doesn’t really fix the column in it’s place – as I explained it merely doesn’t create the draggable widget and Feature chooser menu for that column. However, since other columns can move, they can and probably will push that column out of it’s place. Also the API method can move that column regardless.

Notes, tips and tricks

The feature offers a single method, but a ton of settings and events you can make use of in creating amazing grid experiences. There are some options that probably didn’t make it to the jQuery API page(happens, being CTP and all):

The hidden settings

The column header users drag can be made transparent though the ‘dragHelperOpacity’ as it is exactly that the helper for the jQuery UI Draggable and this directly corresponds to the opacity property.

There are two tolerance settings for this feature and they are both only regarding the Drag&Drop interaction side of Column Moving – besides letting you dragging the header around the feature is also kind enough to scroll the grid for you when you go near the edge. The edge is actually a distance threshold defined by the ‘movingScrollTolerance’ property (length (in pixels) below which horizontal scrolling occurs) and supported by ‘scrollDelta’ that dictated how much should be scrolled each time.

Then you also have the ‘movingAcceptanceTolerance’ which is how the feature checks if you are close to a possible column drop point and the column/indicator should be moved there. I think a visual explanation will be great for this. The default accept tolerance is 20px which means that if the edge of the helper moves closer that that to some edge, that edge will be accepted as target position for column moving, see what I mean:

The Column Moving accept tolerance of 20px visualized as a green-ish area, that once crossed by the drag helper will cause a colum/incidator move.

There’s a very important note for the tolerance settings – use wisely and with caution– imagine what will happen if you crank up the tolerance too much, like wider than your columns? The feature will totally go crazy and drag column moving will produce highly unpredictable results! I’d say those 20px as pretty confortable, but hey with great settings power comes great… you get the point!

The ‘hideHeaderContentsDuringDrag’ which is why the actual column header above is empty when dragging.

Multi-Column headers and hierarchy

The Column Moving acts really well with this (also new) feature and also plays nice with the Hierarchical version of the grid. The drag helper/header is restricted within the confines of it’s respective grid (which prevents child-parent moves in the Hierarchical Grid) and won’t be accepted outside it’s column group, so the Multi header settings are respected. There are some gotcha-s here – the API move method will believe you more that the user and attempt to move whatever you tell it to wherever – yes you can move entire header by identifier, but careful with indexes – they include the group and vary inside it as well. I might do a whole blog on that later on, but for now just thoroughly test if you combine those features.

Performance

So, back to those move types. As you might've guessed there’s a reason why the move type is exposed to the developer – it has performance implications because of the ways the actual moving is performed. Remember how data is laid in the HTML table – by columns? Of course not – it’s by rows. That means finding the right cell, detaching it and re-attaching it before/after a different target cell. That’s not that bad, but consider it is done for every row each time you move a column! It can get pretty intensive.

The re-render, on the other hand, destroys most of the grid layout and based on the already updated data source renders the data table again. So how’s that for intensive? Well, it depends kind of… Our developers noted this and I did some very quick tests to confirm this:

As a general rule of thumb, DOM Column Moving is faster for most browsers, but (surprise, surprise!) the ‘render ‘ is actually faster for IE. And, yes, I’ve tested IE10 thinking there’s probably some sort of an error, but even with small sample numbers the difference was so huge that there’s no way it’s wrong. No idea why – is it the querying of a whole bunch of elements or the DOM manipulation that’s the bottleneck, but it turns out re-rendering is faster for IE.

But, hey, that’s just interesting info – there’s no reason for you to worry or even consider this an issue – there’s an easy solution – please, please use Paging! With reasonable page size the time it takes to move a column of 2000 rows takes a plunge down to a snappy, pretty much instant, 50ms range. Trust me when I say it makes all the difference and it’s an absolute must if you plan on a lot of data. And if for whatever reason you need it all in a single view(page) then enable Row Virtualization! Paging kind of delivers the same functionality and the conclusion is an old one – virtualization is totally awesome with big data and a virtualized grid handles thousands of records like a boss!

Making use of events to enhance functionality

Personally there’s something that bugs me about the immediate mode of the feature.. When dragging columns around in a very demo grid, with all healthy mix of easily distinguishable text/numbers mix in the columns, it’s all good and merry. But when you hit a grid with like all numbers – like it’s very likely to happen in some scenarios – I find it really hard to track my column around. There’s no indicator with immediate, the only notice really is the empty header if hasn’t been disabled or the same text following you around. Good thing the Column Moving Events are many and give you precious information needed to control and/or enhance functionality.

Well I figured I can show you how to events and enrich the experience at the same time. I’ve decided to cheat a bit and steal the Sorting feature indication by highlighting the column currently moving with the following class:

  1. <style>
  2.     .ui-iggridtd.ui-state-moving {
  3.         background: 0;
  4.         background-color: #c2e8f8;
  5.         color: #333;
  6.         font-weight: normal;
  7.         text-shadow: 01px0rgba(255,255,255,0.8);
  8.         border-color: #b3e2f6;
  9.         border-width:  1px;
  10.     }
  11. </style>

Two things to note here – this is almost identical to the highlight Sorting uses, just renamed so it won’t mess with the feature’s CSS, but if you absolutely know you won’t be using Sorting or it’s highlight, it’s safe to just apply ‘ui-state-highlight’. And secondly, if you are using it with sorting CSS you might want to consider some different colors. Having said that, applying the class is extremely easy:

  1.         features: [
  2.             {
  3.                 name: "ColumnMoving",
  4.                 mode: "immediate",
  5.                 columnDragStart: function (event, ui) {
  6.                     ui.owner.element.find('tr td:nth-child(' + (ui.columnIndex + 1) + ')').addClass("ui-state-moving");
  7.                     colMovingKey = ui.columnKey;
  8.                 },
  9.                 columnDragEnd: function (event, ui) {
  10.                     var grid = $(event.target).data('igGrid');
  11.                     var newindex = grid.options.columns.indexOf(grid.columnByKey(colMovingKey)) + 1;
  12.                     grid.element.find('tr td:nth-child(' + newindex + ')').removeClass("ui-state-moving");
  13.                 }
  14.             }
  15.         ]

The drag start and end events correspond directly to the jQuery UI Draggable events, and they even relay most of the common arguments. The other events include a column moving and moved events to react before and after a move, and then a whole bunch of events related to the additional menu and dialog.

The above snippet is only fit for a very basic layout (the demos include a somewhat acceptable version with multi-column headers as well, so check them out). The result looks something like this – just imagine a much bigger grid and better image quality:

Using the events of Column Mvoing to add a highlight while dragging.

As I always say, it’s not as much about modifying the feature, but showing you can quickly apply enhancements and control at various points of interest. And it’s that easy!

Resources

So besides all the links sprinkled all over, here’s a quick and useful list of info and demos:

Donwload your Ignite UI Free Trial now!

I’d love to hear some thoughts, so leave a comment down below or @DamyanPetev.

And as always, you can follow us on Twitter @Infragistics and stay in touch on Facebook, Google+ and LinkedIn!

Controls to Images behind the scene

$
0
0

Hi, 

Here is the sample project upfront as you would prefer. It uses an Infragistics NetAdvantage for WPF 2012 volume 2 control, however the approach should work for all controls.

This is a follow-up on a blog that I had done a while back for creating images from controls: http://www.infragistics.com/community/blogs/petar_monov/archive/2012/03/14/controls-to-images.aspx . The last one used the rendered controls in the visual tree in order to render an image using the RenderTargetBitmap class, of course a few twists. 

This was all cool, however there was always the question of how this can be done without adding the control to the visual tree to be visualized prior to rendering an image. The answer is actually quite simple, you can simulate the control’s lifecycle within the visual tree and get the same result, without actually adding the control anywhere.


This is why I decided to write this up in a blog and decided, on what better control to use than the XamBarcode, which many have requested to printed out behind the scene as a result to some data manipulation. All that is needed is an XamBarcode instance (in my case XamQRCodeBarcode) calling its Measure and Arrange measures with some sort of predefined boundaries in which the methods can work (in my case I am setting only the Width, so the XamBarCode can set the height accordingly/proportionally to the data and provide more accurate sizing of the desired image) and as in the above mentioned blog post:

RenderTargetBitmap.Render(xamBarCode);

and recieve this *.png file as result:

Hope you like this.


Ignite UI Release Notes - February: 12.1, 12.2 Service Releases

$
0
0

NetAdvantage® for jQuery is now named Ignite UI™. Please see this blog post for more details. With every release comes a set of release notes that reflects the state of resolved bugs and new additions from the previous release. You’ll find the notes useful to help determine the resolution of existing issues from a past release and as a means of determining where to test your applications when upgrading from one version to the next.

Release notes are available in both PDF and Excel formats. The PDF summarizes the changes to this release along with a listing of each item. The Excel sheet includes each change item and makes it easy for you to sort, filter and otherwise manipulate the data to your liking.

Download the Release Notes

Ignite UI 2012 Volume 1

Ignite UI 2012 Volume 2


NetAdvantage for ASP.NET Release Notes - February: 12.1, 12.2 Service Releases

$
0
0

With every release comes a set of release notes that reflects the state of resolved bugs and new additions from the previous release. You’ll find the notes useful to help determine the resolution of existing issues from a past release and as a means of determining where to test your applications when upgrading from one version to the next.

Release notes are available in both PDF and Excel formats. The PDF summarizes the changes to this release along with a listing of each item. The Excel sheet includes each change item and makes it easy for you to sort, filter and otherwise manipulate the data to your liking.

Download the Release Notes

ASP.NET 2012 Volume 1

ASP.NET 2012 Volume 2

Prototyping for Windows 8: Creating the Start and Splash screens

$
0
0

In this tutorial I will show you how to create the Start and Splash screens for the RecipeLater Windows 8 sample in Indigo Studio.  I have provided both a screencast (in up to 1080p HD quality) as well as a step-by-step set of instructions with screenshots.  Pick the path that works best for you.  Both contain the same information. Future tutorials will show how to build the rest of the screens for the prototype.

Screencast

Make sure to set the quality to 1080p!

protowin8-1

Creating the Start Screen

Start by creating a new Screen in Indigo Studio.  Make sure the “Start a Brand New Design For” dropdown is set to “New Project”:

new-screen-thumb

Next, you will need to configure the screen size and background color.  Select the “Custom” size option and input 1366 for the width and 768 for the height:

screen-resolution

Set the background color to black:

screen-color

Add an Image to the screen either by dragging it in from the Toolbox or alt/option click on the screen and type “Image” in the quick add box:

add-image

Click on “Pick Image” and select the “windows8home.png” file that was in the zip file you downloaded above.  Center the image in the screen and your screen should look like this:

before-hotspot

At this point if you run your prototype, the screen will look right for the Start screen but it is missing the fade in animation that the sample has.  Let’s add that to the prototype.  At the bottom of the screen click on the Transitions/Animations panel to bring it up and then click on "Add an Opening Animation”.  Delete the second animation segment that is added to the the opening animation by default.  We won’t need it in our animation.  The top row of this panel represents the Image we added.  Drag the “Add” timeline entry out to 0.75s to create the fade-in animation.  If you have done this correctly, the animation panel should look like this:

configure-opening-animation

Test your prototype at this point by clicking the “Run” button in the top left of the screen.

At this point, it’s time to add the hot spot to the RecipeLater tile.  This hot spot will allow the user to tap or click on the RecipeLater tile to “launch” the RecipeLater application within the prototype.  Alt/Option-drag over the RecipeLater tile and type hot spot in the quick add box.  The result should look like this:

add-hotspot

We want the prototype to navigate to a new screen when it is tapped or clicked, so click the “Add Interaction” button.  On the next dialog, click “Navigate” as shown and then on the next dialog click on “Screen in Project” since we want to create a new screen for our splash screen:

add-interactionscreen-in-project

The next popup will give you a choice to either select an existing screen or create a new screen.  Type “Splash Screen” into the text box at the bottom and click the “Create” button:

create-splash-screen

This will create a new screen called “Splash Screen” in your project.  It also hooks up the interaction for clicking on the hot spot.  You can test this now by running the prototype.  Clicking the RecipeLater tile should navigate to a blank white screen.  Now we’ll configure the Splash Screen so that it behaves the way it does in the original prototype.

Setting up the Splash Screen

Set up the screen resolution and color like you did for the Start screen.  This time, instead of choosing black for the background you should set the background to #417BAD which is one of the blue colors in the palette.

splash-screen-size-color

Add a Title to the screen and set its text to “RecipeLater”.  Set the text color to white and the font size to 48 as shown below:

splash-title-config

Position the label in the middle of the screen vertically and just to the right of center.

Next add an icon and change its color to white.  Select “Pick icon” and type “cloud” into the search box to find the cloud as shown below:

cloud-icon

Resize the cloud to be just slightly larger than the “RecipeLater” title and position it directly to the left of the title.

Now, add another icon and set its color to white.  Pick the “text” icon.  Position the text icon inside of the cloud icon.  When you have everything positioned, drag-select all three objects and click “Group These” as shown below.  This will allow us to animate them all together when the screen loads.

group-splash

Open up the “Transitions/Animations” panel at the bottom of the screen and configure the opening animation as you did for the Start screen.  Set the “Add” duration for the group to be 2.0s as shown:

splash-animation

At this point, your Start and Splash screens are done.  Go ahead and test your prototype.

Summary

In this post, I’ve shown you how to set up the first two screens of the RecipeLater prototype.  While these screens are admittedly very simple, they do serve as a good starting point for familiarizing yourself with Indigo Studio.  In future parts of the series we’ll look at some more complicated screen construction and animation but hopefully now you feel comfortable getting basic stuff accomplished in Indigo Studio.

Contact

If you have any questions or comments, please comment below or find me on Twitter @brentschooley.  You can also email me at bschooley@infragistics.com.

Five of our favorite Twitter lists

$
0
0

Back in 2009 Twitter launched its Lists feature, allowing anyone to create useful lists of Twitter accounts. Since then the feature has proven successful, especially as they allow you to keep tabs on accounts that you may not necessarily want to follow.

Here at Infragistics we use lists quite a bit, so here are five (in no particular order) Twitter lists that we are finding useful right now.

HTML5 (Twitter list here)
This list currently stands at 58 members and is dedicated to the subject of HTML5, which is pretty integral to what we do

JQuery (Twitter list here)
JQuery is another staple technology we use almost every day. This list currently has 21 members and is maintained by Paul Wallace, a developer from Northern Ireland

ASPInsiders (Twitter list here)
This is a pretty big list of user accounts, with over 130 at the last account. The list is based on the Insiders group membership (see their webite here)

SharePoint MVPs (Twitter list here)
Another big list (98 members), pulling together Microsoft certified “Most Valuable Professionals” in SharePoint.

Windows Phone Dev MVPs (Twitter list here)
Similar to the SharePoint list, but focusing on Windows mobile dev, this is another good list packed full of experts.

You can check out which Lists include our Twitter account (which is@infragistics) by looking here.

3 Great jQuery Conferences in 2013

$
0
0

Those who have worked a lot with jQuery will know there is a great community supporting it. This community exists offline as well as on (check out the jQuery Foundation website for lots of great online resources) in the form of a number of great conferences and meetups. Here are the details on 3 great jQuery conferences, supported by the jQueryFoundation.

jQuery ControlsjQuery Conference Toronto - March 2nd& 3rd - http://jqueryto.com/

This is the first ever jQuery conference held in Canada, at the University of Toronto. Spread over 2 days, the schedule packs in over 30 speakers covering HTML, CSS, and of course JavaScript. You can register now here. Tickets are priced at $250.

jQuery UK 2013 - April 19th - http://events.jquery.org/2013/uk/

jQuery UK is held in London this coming April. Speakers include Brendan Eich, the father of JavaScript and CTO of Mozilla. The day after the conference, (April 20th) is a specially staged Hackday allowing conference attendees to put the lessons they’ve learned into practice. Who will win the battle of the hacked remote controlled cars? Tickets and prices can be found here.

jQuery Conference Portland - June 13th& 14th - http://lanyrd.com/2013/jqcon/

Those based in the US have the chance to attend this jQuery Foundation hosted event. This is expected to be the biggest event yet, with over one thousand attendees. Held at the Oregon Convention Center, the show features two tracks of talks, which includes a dedicated training day. Ticket info is here

Office 365 will soon be with us. Do your users require training?

$
0
0

The latest, and arguably the largest, upgrade to Office 365 is set to roll out to all business customers by February 27, 2013. This new version will be based on SharePoint 2013, and brings with it the new Windows UI look and feel (as seen in Windows 8 and Office 2013). This user interface is a bold step forward, and opens up a number of new features and functions. But it also poses a number of challenges.

When an Office 365 instance is upgraded, users might simply login to the system one day and see a whole new look and feel. In effect, they may feel like they are looking at a brand new system. This raises some important questions. Were they expecting it? Are they able to use it straight away? Is any support provided to explain or help with new features and ways of working?

In an ideal world, users wouldn't need training in any software. In the case of the new Office 365 they would just pick up the system and carry on as if nothing had happened. But realistically a little change management is going to be needed to keep everybody productive. Features move, options change, and users generally dislike new systems.

At the very least these users should be informed in advance of what is about to happen. Better still they would be exposed to a test system in advance; those who need it could be offered additional help (anything from light reading to full on training).

It may seem a trivial point, but what might feel like just a cosmetic upgrade could have significant ramifications, possibly financial, if people cannot do their jobs.

So if your users are about to experience all that is great about the new Office 365, make sure you give them a little warning and support first. Think about the following:

  • Devising a communications plan (even if it is just a few upfront emails)
  • Giving access to training or reference documentation
  • Providing some demos (live or screencasts)
  • Full on user training, may be targeted at specific users

Your users will thank you afterwards.

Viewing all 2372 articles
Browse latest View live


Latest Images